How to cast Miniature Foods using Melting Wax
Today's blog post is sponsored by LKKRO Waxing Kits
Casting in resin can not only get expensive but it has some limitations as well, like not being able to add fragrance. When casting miniature foods with wax however, you can add fragrance to it, making your cakes and cookies actually even smell.
What you need for this project
- Wax melting pot ( I am using LKKRO Waxing Kit)
- Wax beads or 100% natural Soy Wax
- Scented Oils (Grandmas Kitchen Scented Oils)
- a wooden stick for stirring
- a small ladle or spoon for pouring the wax
- flexible silicon molds
- paper towels
- a knife (I use an Exacto knife and pliers )
- optional heating gun
How to make the molds using wax

- Turn the melting pot on high
- pour your beads in and replace the lid so that the beads can melt (amount of beads used really depends on your project size and you will have to experiment a bit)
- Once the wax is melted you can add a scented oils (ratio should be 3 parts fragrance to 1 part melted wax) - stir well

- Optional add scented oils ( Grandmas Kitchen scented oils available via Amazon)
- Select your flexible mold and using your spoon fill it with melted wax

- Set aside until wax hardens (curing time varies depending on the size of the molds) The curing time depends on the size of the mold. Usually when you see the wax changing color and the consistency is no longer jello like it means that the cast has set. Scrape any excess overflow wax off with a wooden stick or your fingernail. Lift the cast carefully out of the mold. Once the mold has been removed remove any imperfections with a knife.

- Use the heating gun to even out the poured wax and to remove any bubbles or cracks. If the casted piece breaks while being removed out of the mold, place it back in and run the heating gun over it until the wax melts again. Then let it set ones more.
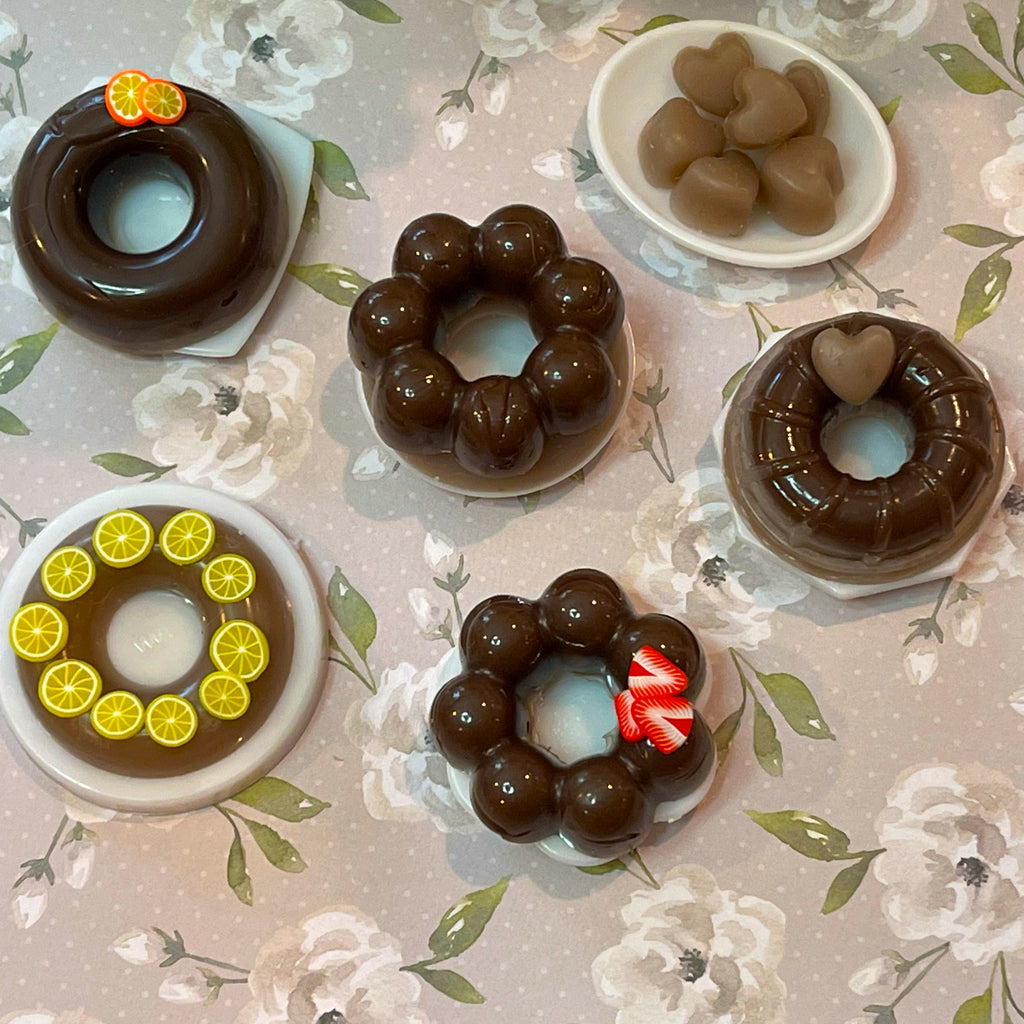
 To create the two tone effect leave some room in the mold and melt a wax in a different color. You can pour it right over the 1st layer. I had some Soy Wax on hand and just added some flakes into the left over brown wax. I let that melt and stirred it to get the lighter shade. Wax comes in different hardness and the wax beads that came with the kit make for a nice hard cast. The Soy wax on the other hand broke more easily when I tried to remove it from the mold.
 The finished cast comes out clean and is ready for further embellishment. I used fruit pieces to decorate my cakes, since I was a bit short in time. I will share other ways to decorate the pieces at another time.
One of the things I love about the melted wax casts is the scent. Cakes and cookies can smell like baked goods and flowers like flowers if you add a few drops of fragrance while the wax is melting.

As mentioned before this blog post is sponsored by LKKRO Wax Kit who sent me their waxing kit. The waxing kit is really meant for hair removal, but it works incredible well for making miniature food items using wax.

What is included in the kit:
- Waxing melting pot with lid and tool rest bar
- 5 hard wax bean (1 black, 2 brown, 1 blue, 1 teal)
- 10 wooden applicator sticks
The wax melting pot has a rotary dial that goes from the On setting to medium and high reaching temperatures between 160-240 F with 100W of power. What I like about this melting pot is the large insert. It has a rubber ring and handle that safeguards against accidental burning when lifting the melted wa container out of the pot. The spoon rest is also a nice addition, it can be removed for cleaning and snaps easily into place again. The melting pot itself is quiet large which is nice when melting large quantities of wax. Since I use it for crafting projects it allows me to determine how much wax to melt based on the size of the project.
The lid is also nice to have since it prevents debris from accidentally flying into the wax and it helps in keeping the wax warm once you turn the unit off.
I made a video so you can follow along