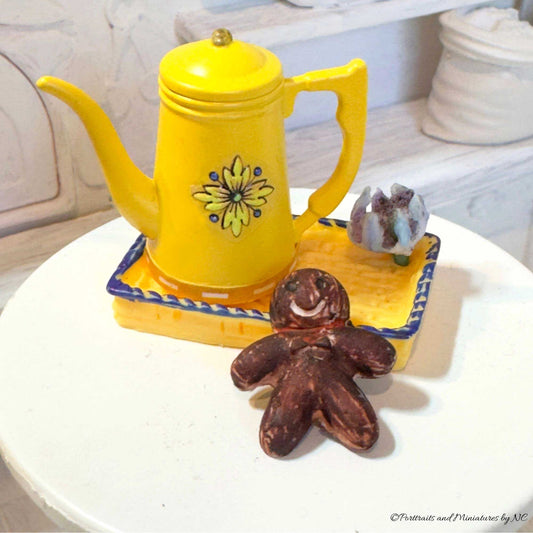
Crafting Joy: Miniature Christmas Cookies with Air-Dry Clay and Silicone Caulking

The holiday season is all about spreading joy and creating memories with loved ones. What better way to do that than by crafting adorable miniature Christmas cookies? In this DIY tutorial, I'll guide you through the process of making these charming decorations using air-dry clay and flexible silicone caulking. Gather your supplies and let the festive crafting begin!
Materials Needed:
- Air-dry clay
- Flexible silicone caulking
- Rolling pin
- Cookie cutters (various Christmas shapes)
- Acrylic paint in festive colors
- Paintbrushes
- Glaze (optional)
- Toothpick or small detail tools
- Wax paper or a non-stick surface for rolling

Step 1: Mixing the Clay and Caulking
Start by taking a small amount of air-dry clay and mixing it with an equal amount of flexible silicone caulking. Knead the mixture until it's well combined, creating a smooth and pliable consistency. This combination gives your miniature cookies durability and flexibility.
Step 2: Rolling and Cutting
Place the mixed clay on a non-stick surface and roll it out with a rolling pin to your desired thickness. Using festive cookie cutters, cut out various Christmas shapes such as gingerbread men, stars, and trees. Remember to use wax paper to prevent sticking.

Step 3: Adding Texture
To give your miniature cookies a realistic touch, use a toothpick or small detail tools to add texture. Create patterns like the classic gingerbread man's icing or the lines on a sugar cookie. This step allows for personalization and adds a delightful touch to your creations.
Step 4: Drying
Allow your miniature cookies to air-dry completely. The drying time may vary, but it's generally recommended to let them sit for at least 24-48 hours. Be patient – the result will be worth the wait!
Step 5: Painting
Once your miniature cookies are fully dry, it's time to bring them to life with acrylic paint. Use festive colors to mimic the appearance of real Christmas cookies. Get creative with your designs and let your imagination run wild!
Step 6: Adding Glaze (Optional)
For an extra touch of realism and to protect the paint, consider applying a thin layer of glaze. This step is optional, but it adds a glossy finish that enhances the overall appearance of your miniature Christmas cookies.

Crafting miniature Christmas cookies with air-dry clay and flexible silicone caulking is a delightful and festive way to add a personal touch to your holiday decor. Whether you use them as ornaments, gift toppers, or simply as charming decorations, these handmade treasures are sure to bring joy and warmth to your holiday season. Happy crafting!