Lighting Solutions

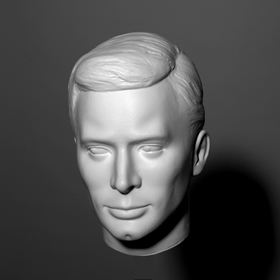
Rembrandt Lighting
Pros
It is a common photography technique.
Cons
Can be tricky painting to make good transition from extreme dark values into light.
Light set up
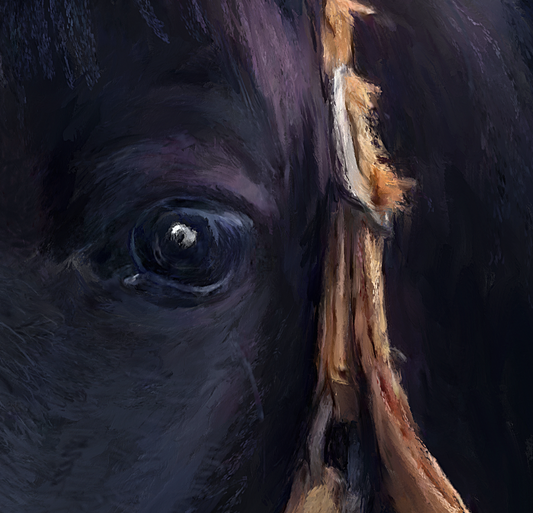
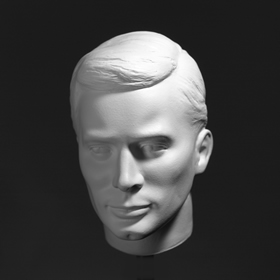
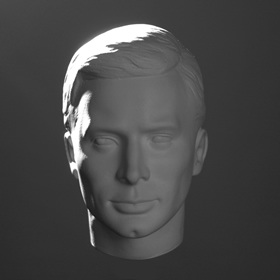
The key in Rembrandt lighting is creating the triangle or diamond shape of light underneath the eye. One side of the face is lit well from the main light source while the other side of the face uses the interaction of shadows and light, also known as chiaroscuro, to create this geometric form on the face.

The triangle should be no longer than the nose and no wider than the eye. Rembrandt lighting is a combination of short and butterfly lighting-- and as such it is actually the eye closest to the camera (on the broad side of the face) that should have the triangle of light. The narrow side is illuminated. This technique may be achieved subtly or very dramatically by altering the distance between subject and lights and relative strengths of main and fill lights.

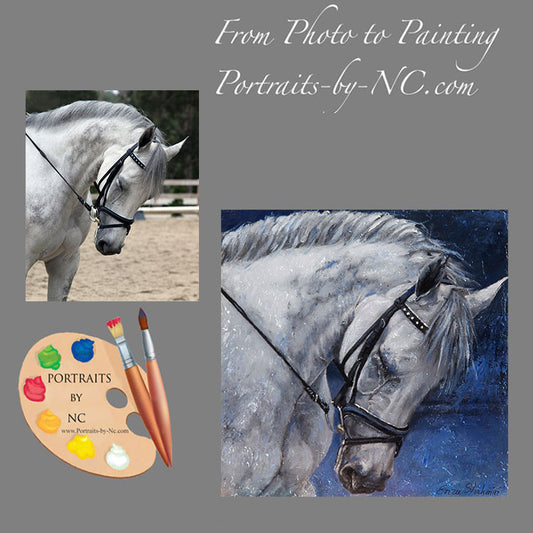
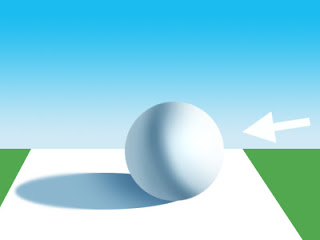
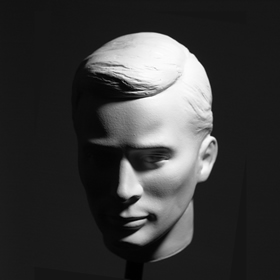
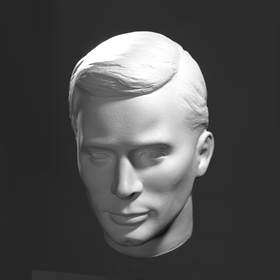
Side Lighting or Form Lighting
Pros
- Side lighting reveals the form and texture of an object the most and gives it a three-dimensional quality.
- Most frequently used for model set up in class room settings
- It tends to emphasize the character of a person.
- Shadows are prominent and contrast can be high as a result.
- Side lighting can be used to throw dramatic shadows onto surfaces such as walls and create atmosphere.
- Side lighting is generally attractive and is often used to great effect: it is the kind of lighting encountered at the beginning and end of the day and as such is often seen in films and photographs.
Cons
- areas of the image can be lost in shadow, and it can reveal imperfections such as wrinkles.
- In portrait photography for instance it is generally used on men rather than women because it can look quite harsh, especially if the shadows aren't soft edged.
- Tends to bleach out some of the color in the highest lights.
Light set up
The object is anywhere from one-half to three-quarters in light and the rest is in shadow.
Soft Light
Soft Light using Fill Light
Light that passes through cloud or diffusion filters, or is bounced off opaque surfaces, loses its directional properties and becomes soft light.
Pros
- This light can be used to soften the harshness of direct light shadows, or modelling light shadows, whilst also increasing the ambient light level around or falling on the subject. (When working outdoors an opaque reflector board is often used for this purpose, provided there is adequate available light. This aspect of lighting is also referred to as fill lighting.)
Cons
Soft Light without fill light
Modeling Light
Pros
The relief or contours of objects may be exaggerated with dramatic effect.
Cons
Might be too harsh on Children
Light set up:
By moving the point source of the light, or the object itself within the path of the light, you can control the shadow effect. This is called modelling and the light creating this effect is referred to as the modelling light. Alternatively, when modelling becomes the main objective of the lighting set-up around which all other lights are then secondary.
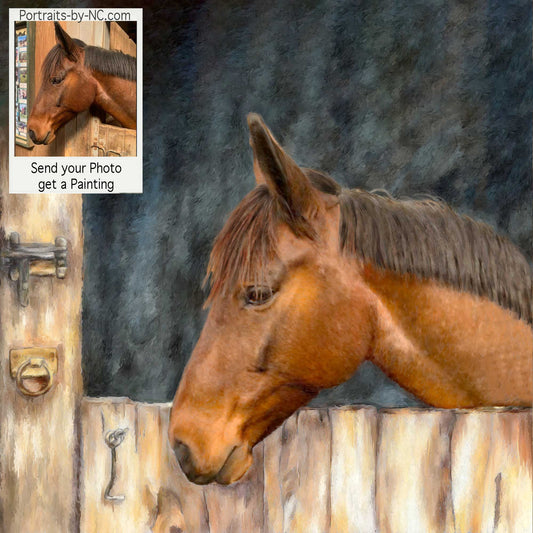
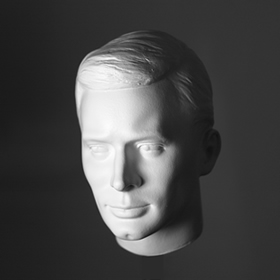
Front Lighting

- This is when the light is directly in front of the object.
Pros
- Objects in front lighting show their colors at their purest.
- However soft diffused frontal lighting can be flattering to some subjects for this very reason - it can help conceal wrinkles and blemishes
- great for placing emphasize on color or pattern of an object
- it can be used to soften the harsh shadowing which is sometimes caused by direct sunlight
- can be used to counteract a modelling light which is being used to light the rest of the scene
Cons
- since there are no shadows, form or texture are not revealed, hence things look flat.
-can make people look fatter than they are - see below what to do...
Pay attention to:
- the edges of the form are painted in darker than the mass. Once the darker edges are brushed together with the mass the illusion of form is achieved.
- Front light can make people appear fatter than they are. Compensate by drawing the subject a bit thinner and longer as they actually are.
Front Light with soft light diffuser
Light set up:
In order to be effective without being obvious, front lighting is very often diffused (soft). Front lighting is usually positioned just above the camera lens axis and fixed to the camera top via the accessory shoe or carrying handle. This light looks straight at the subject from approximately the same point of view as the camera lens.
Three Light Set UP
The three light set-up from the left
Light set up
- The key light is your main source of light that shines directly upon the subject and serves as the major lighting factor of the 3. The strength, color and angle of the key light determines the picture's overall lighting design. A bright studio light, camera flash, or even the sun are commonly used as the key light.
- Question where the light is supposed to be coming from, and what its source is supposed to be - a window or overhead light?
- Then decide how much you need to model the features of the subject - the cheekbone, eyebrow, nose, and chin shadows.
- The second type of light in this system is fill light. It will also be shining onto the subject, but from an angle rather than directly. It should balance the key light by illuminating the shaded areas on the subject such as deep shadows on a person's face caused by the bright key light. It is usually a softer and less bright light than the key light who's main purpose is to help create a more natural lighting feel.
- The back light should shine on the subject from behind either directly or at an angle to give the subject a rim of light. This light rim surrounding the edges of the subject will help to separate the subject from the background and highlight the subject's form.
Modelling and Fill Light lit from the right
Modelling and Rim Light from the right
The Standard Three Light
In a standard set-up the modelling light may be used to simulate light coming from a window, so position this light out of shot, forward of the subject and at window height. When the desired modelling effect has been achieved, the soft fill-light can then be added. This should be placed nearer the lens axis on the opposite side to the modelling light in order to soft light the shadowed areas created by the modelling light. Avoid creating further shadows by over-powering the modelling light effect.
Finally, add the rim or back light. This can be positioned behind the subject, on the darker side, and high enough to rim light the top of the
head and shoulders. If required, spill light from this light may be used to light the background.
Back Lighting
- the light source is behind the object
- the object will appear either as silhouettes or darkly lit by the fill light.
- the viewer is looking into the light source
Pros
- creates a high contrast setting
- can appear very atmospheric and dramatic
- Back lit scenes usually contain a lot of shadow unless the light source is very soft.
- Most of the time the subject will be predominantly dark with dramatic pools of light.
- The rim lighting that occurs in this situation can be very useful for defining forms among the shadows.
- This kind of light reveals transparency, translucency and any fine detail or texture along rim-lit edges.
- This kind of light is very effective for lending drama to an image.
Cons
-Everything is in shadow on the subject
- Generally less detail on the subject
What to pay attention to
-Modeling of form is achieved by very subtle value changes
- If one goes too high in value the lighting effect will be lost
Light set up
Set the light source at a slight angle relative to your point of view. The subject will have a rim of light defining one or more of the edges. The harder the light the more pronounced this rim will be.
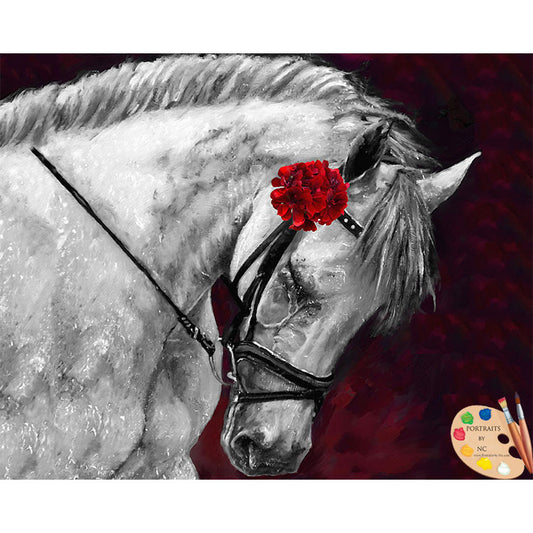
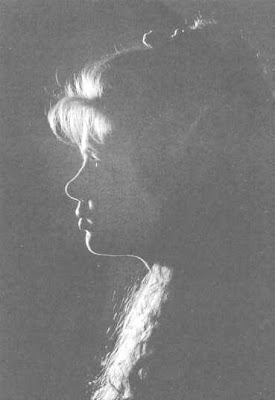
Rim Lighting
Direct unfiltered light can be used to silhouette an object or person from behind. This light is usually positioned slightly high and outside the scene in such a way as to light the edge or rim of the subject. This will give the intriguing effect of light coming from a window somewhere out of shot, and this extends the viewer's imagination beyond the limits of the framed image.
Pros
- The most dramatic and brilliant of all the lighting conditions.
- This effect is often used in portrait photography to outline the subject from the background, where the two would otherwise merge.
- Most commonly used by illustrators to have figures stand out from the background or to emphasise important areas
- In painting mostly used for moonlight or sunlight effects.
- In the shadow side of rim lighting a lot of modeling of form and manipulation of hues can be achieved.
Cons
- Local hues and values of an object bleach out almost completely
- Colors such as red, yellow or blue would hardly be distinguishable from each other
- Black, a middle value and white would be almost the same value on the light side.
Pay attention:
- Don't overdo rim lighting, as it can be very distracting. You may have noticed this in some portrait photographs where strands of hair, picked up by the rim light, glow brilliantly against the background and look strangely unnatural.
- Rim lighting, weaker than normal conditions will change the light side from white to the 7th value and the shadow side from the 7th value to black. This means that white in the shadow is the same value as black in the light (7th value)
Other Samples:
Lighting from Above
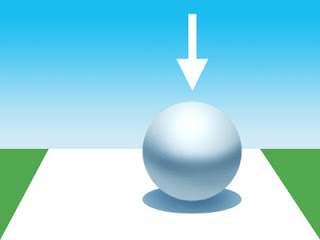
Top lighting is common in overcast daylight. It can also be encountered in sunshine at midday, in some interiors and in other situations such as stage lighting.
Pros
- In soft light it is an effective way of showing form.
- Under hard light it can lend an air of mystery by casting dramatic shadows which conceal most of the forms beneath them: for instance people directly underneath hard lights will have black holes for eyes since their eye sockets will be in total shadow.
- Lighting a figure from straight above can give a broody and menacing look. It emphasises bone structure and the depth of the eye sockets. Creates an uncomfortable feeling.
Cons
?
Light set up
Position light directly under subject's face.
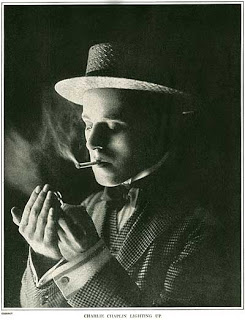
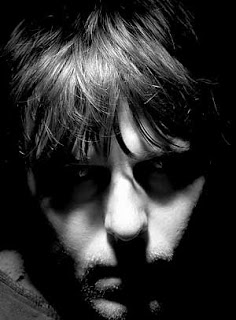
Bottom Lighting
In a natural context this might happen if someone is standing over a campfire, or holding a torch. Reflected light can also come from below, from water for instance. It would definitely lend a strange appearance to even the most familiar things since what is usually seen in light and shade would be reversed (think of a person shining a torch onto their face from below: the shadows appear to be upside down).

Lighting a figure from below creates a spooky and unfamiliar look, even the highlights in the eyes look strange because of their placement. Notice how the angle of the light also emphasises the texture of the skin. Compare it to the image in the previous section: it is the same face, only the position of the light has been moved, yet they look completely different from each other.
Again, the very rarity of this kind of lighting can be used to creative effect. We instinctively recognise things that don't seem right, and this can be used to create specific moods by manipulating the lighting to convey emotions and responses.
Source: