Chantilly Store 1/24 Scale Dollhouse Kit
Last year I received the Chantilly Store 1/24 miniature kit made by Red Cottage Miniatures as a Christmas gift from my daughter. I have been dying to start on the kit but with running two on-line stores and working on commissions my own personal projects often are put on the back burner.
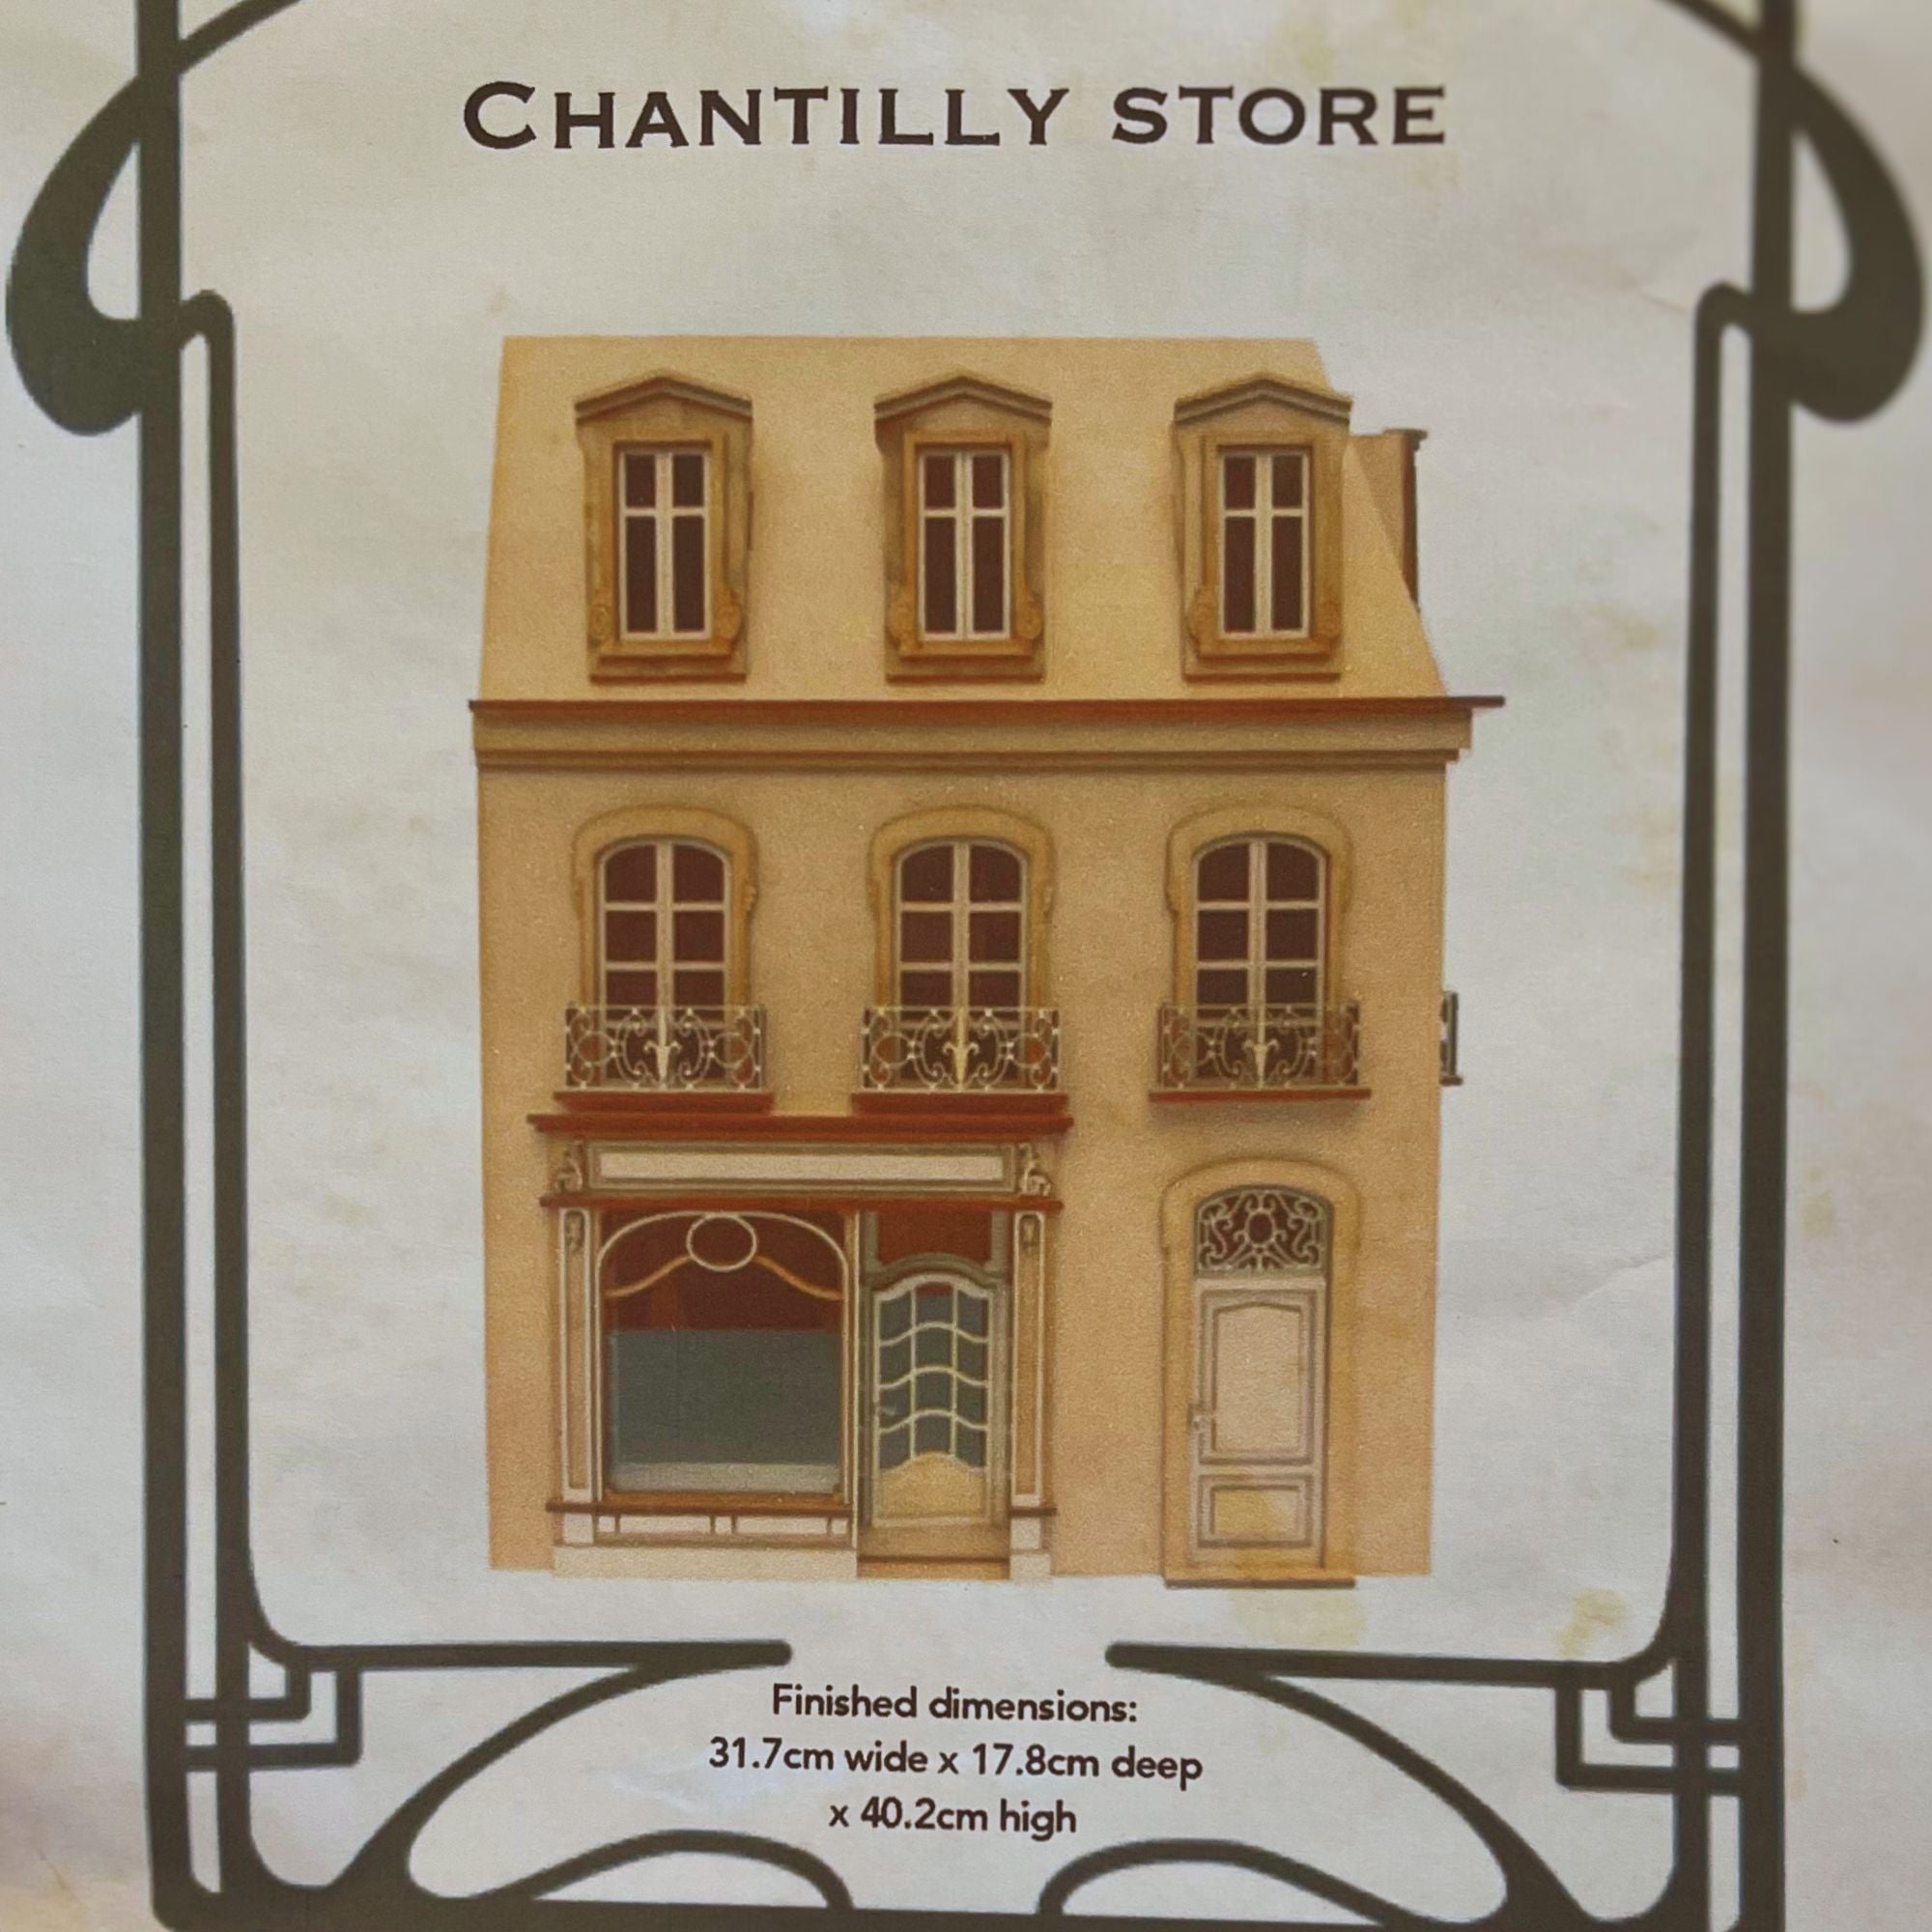
However I decided to squeeze time in by coming into the studio well before 7am to work on this gorgeous kit. The finished dimensions of the store will be 31.7cm wide x 17.8 cm deep and 40.2cm high (12.48in x7.01in x 15.83in)
As of now I have not decided what kind of store it will be or even what color the exterior or interior walls should be. I just want the structure to get out of the box and start building and I am sure the inspiration for the rest will follow.

These are the ground floor stair. Aren't they beautiful? I decided to use the rough side of the wood to give the stairs a vintage feel. Rather than painting over them, I will be using Prisma Color pencils to add color. This kit at 1/24 scale is the perfect size to experiment with a new painting technique to see how well colored pencils work on wood.
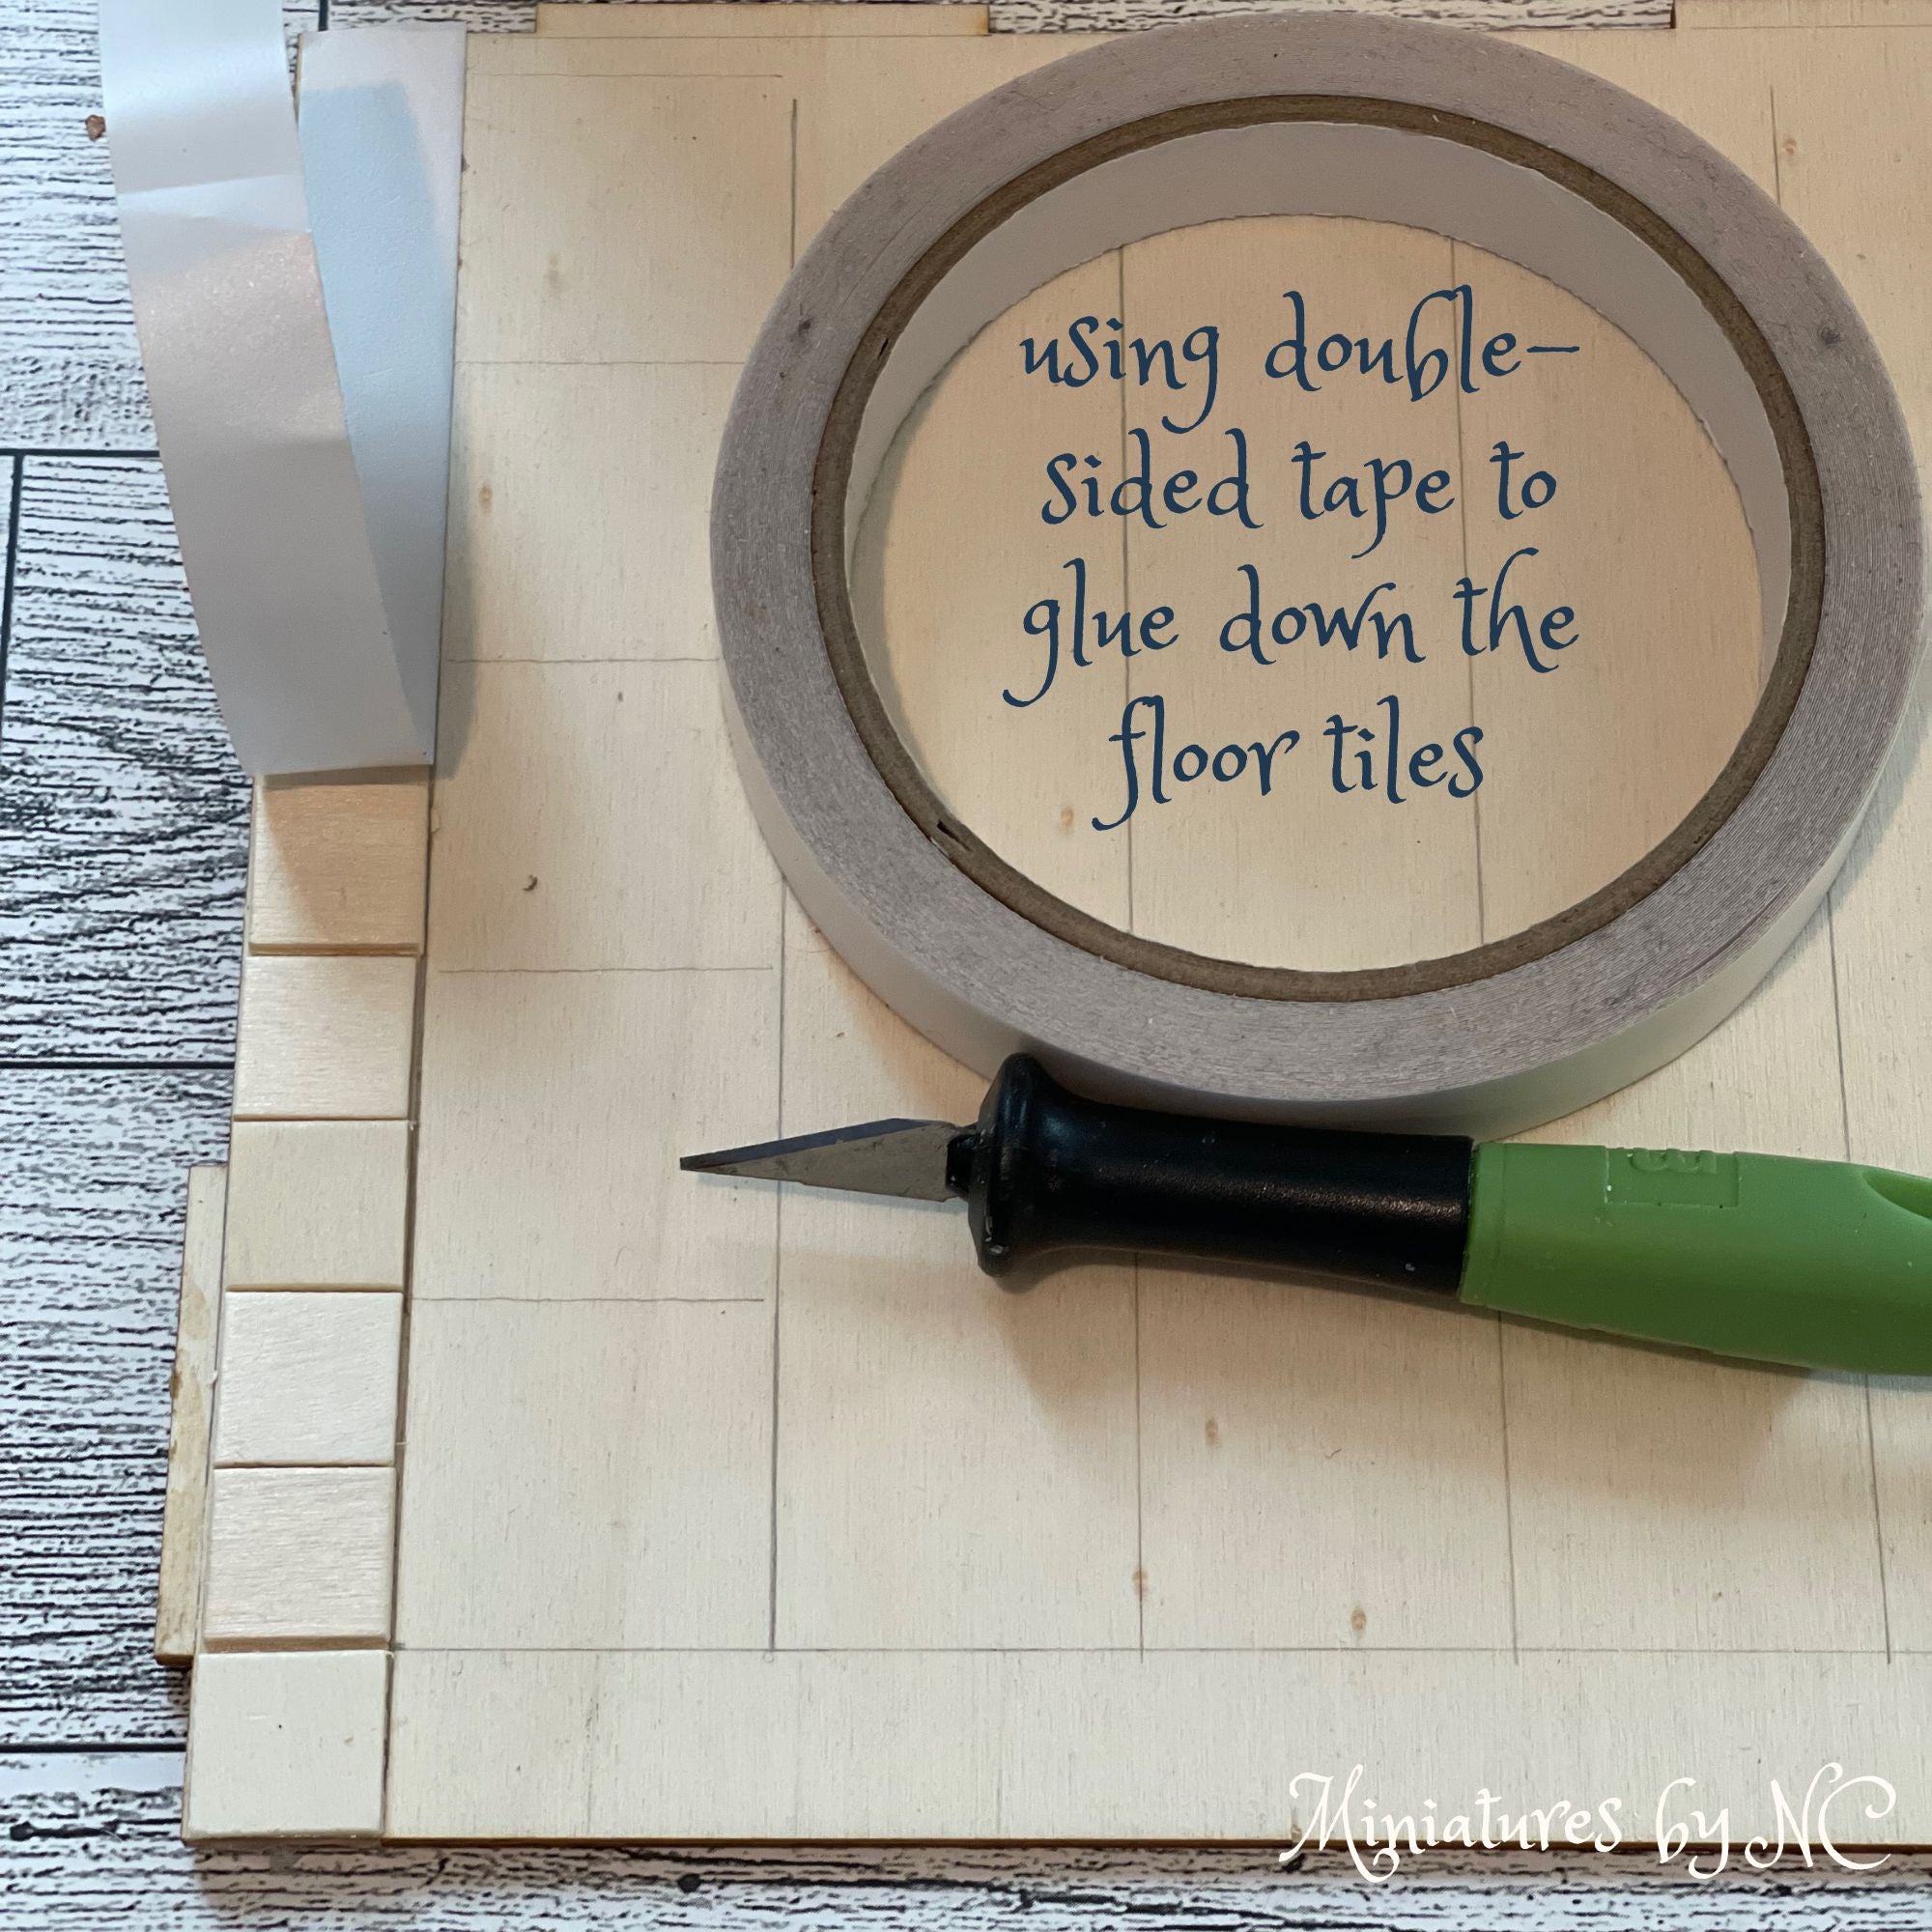
There is moisture in glue which can warp thin balsa wood. In order to reduce the amount of warping, I am using a strong double sided tape to glue down the floor tiles. It helps draw out where the tiles need to go and to work in small sections when placing the tiles down.
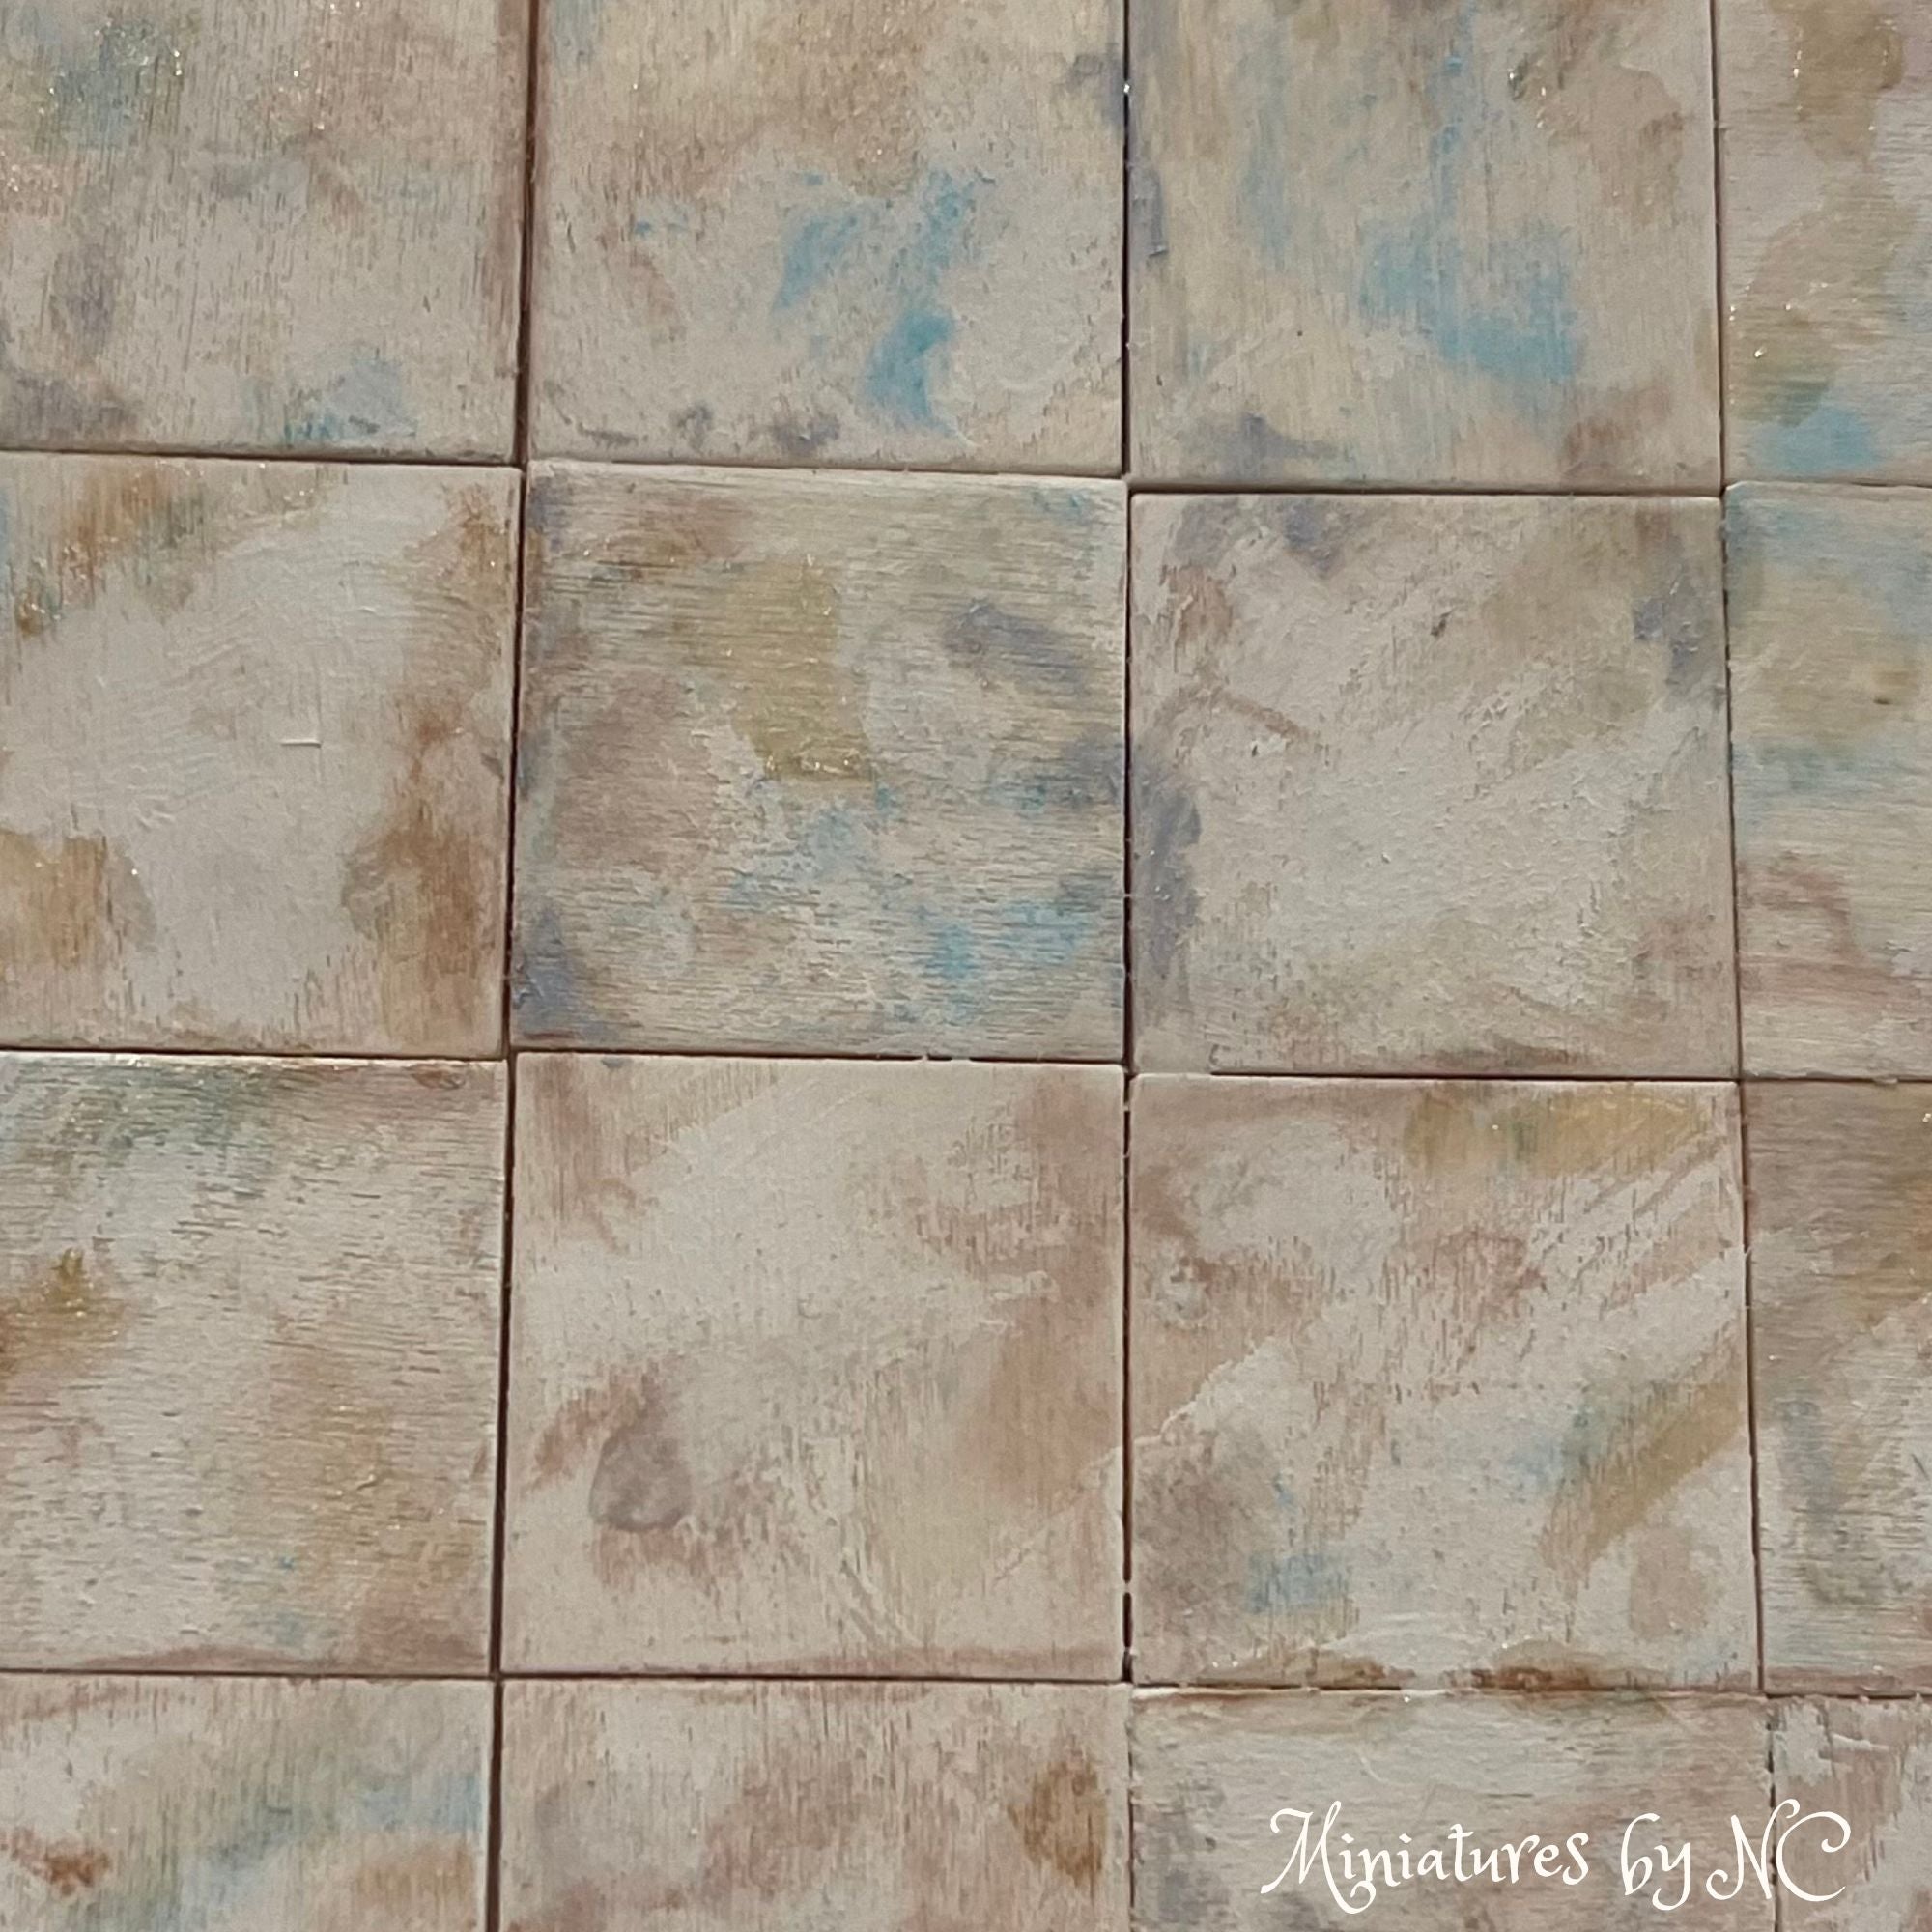
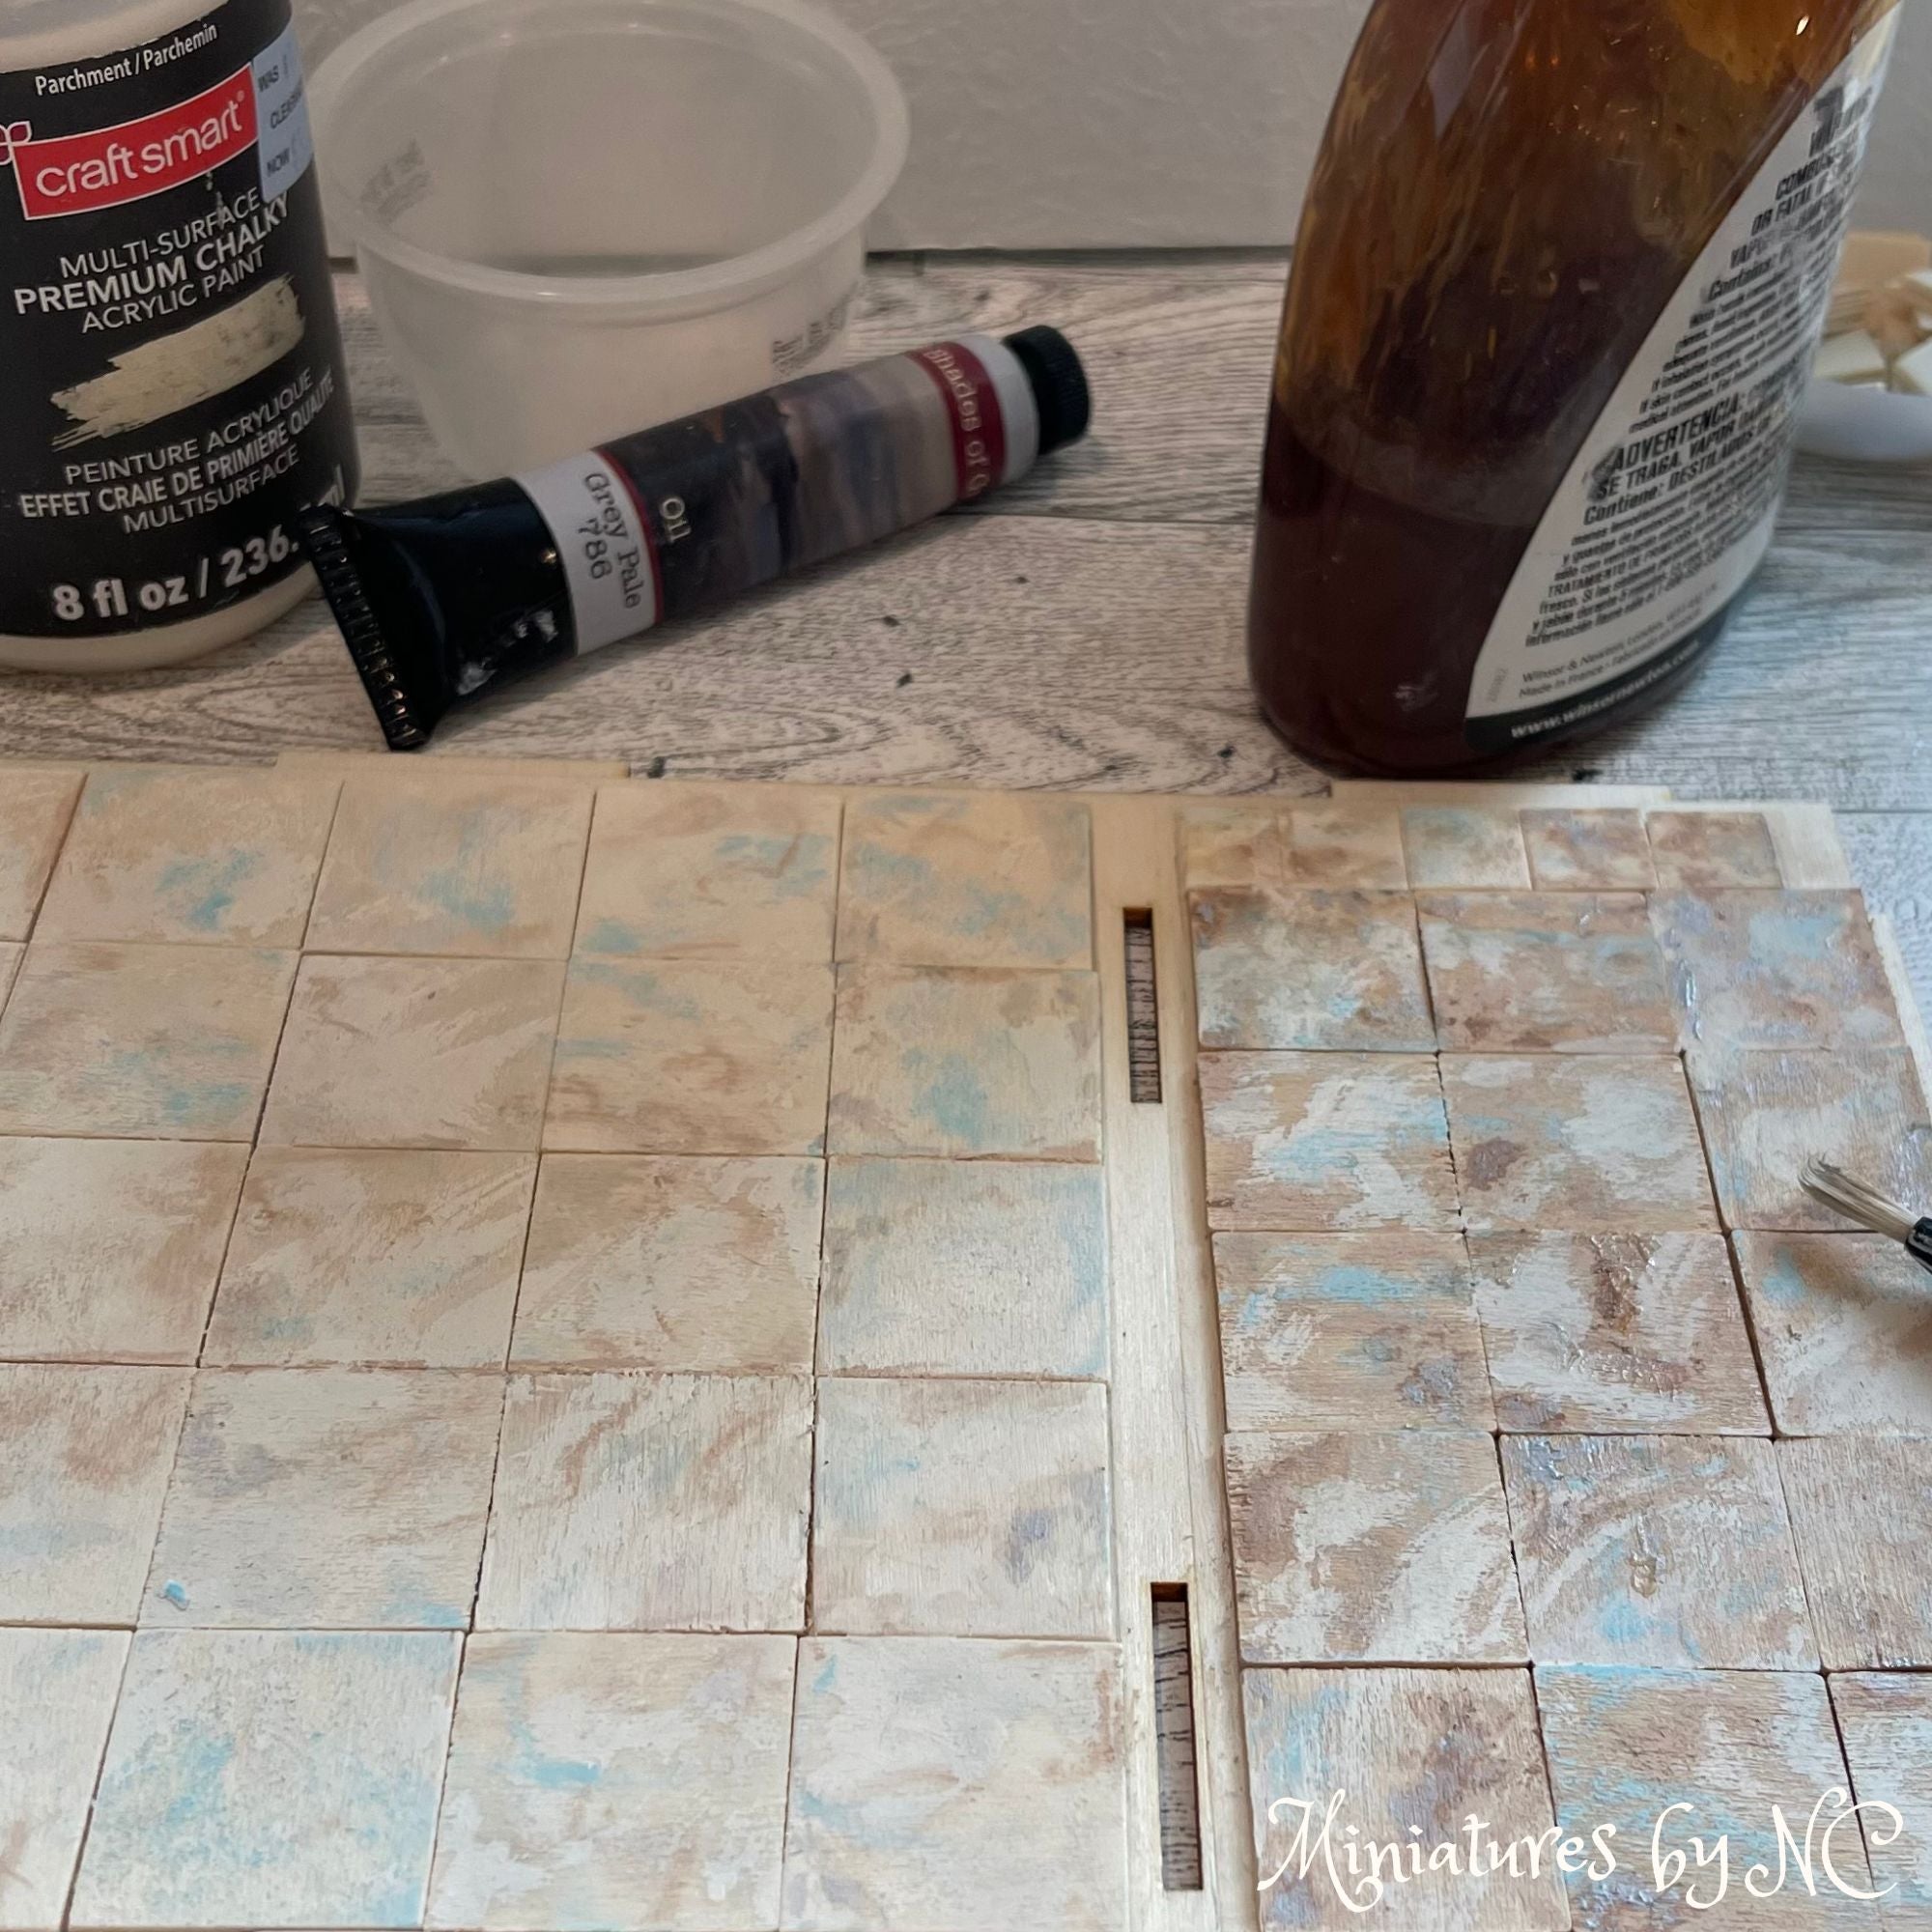 Craftsmart Chalk Paint in Parchment, Pale Grey Oil paint, brown chalk are worked into the wood to give the tiles a mottled look. This look is achieved by randomly dabbing the paint with either a brush or even your fingers. The section for the entry way was made darker to give the illusion of having been dirtied though lots of in and out traffic by the inhabitants and visitors. Once the light goes in it will also give that small room a more dramatic looking feel.
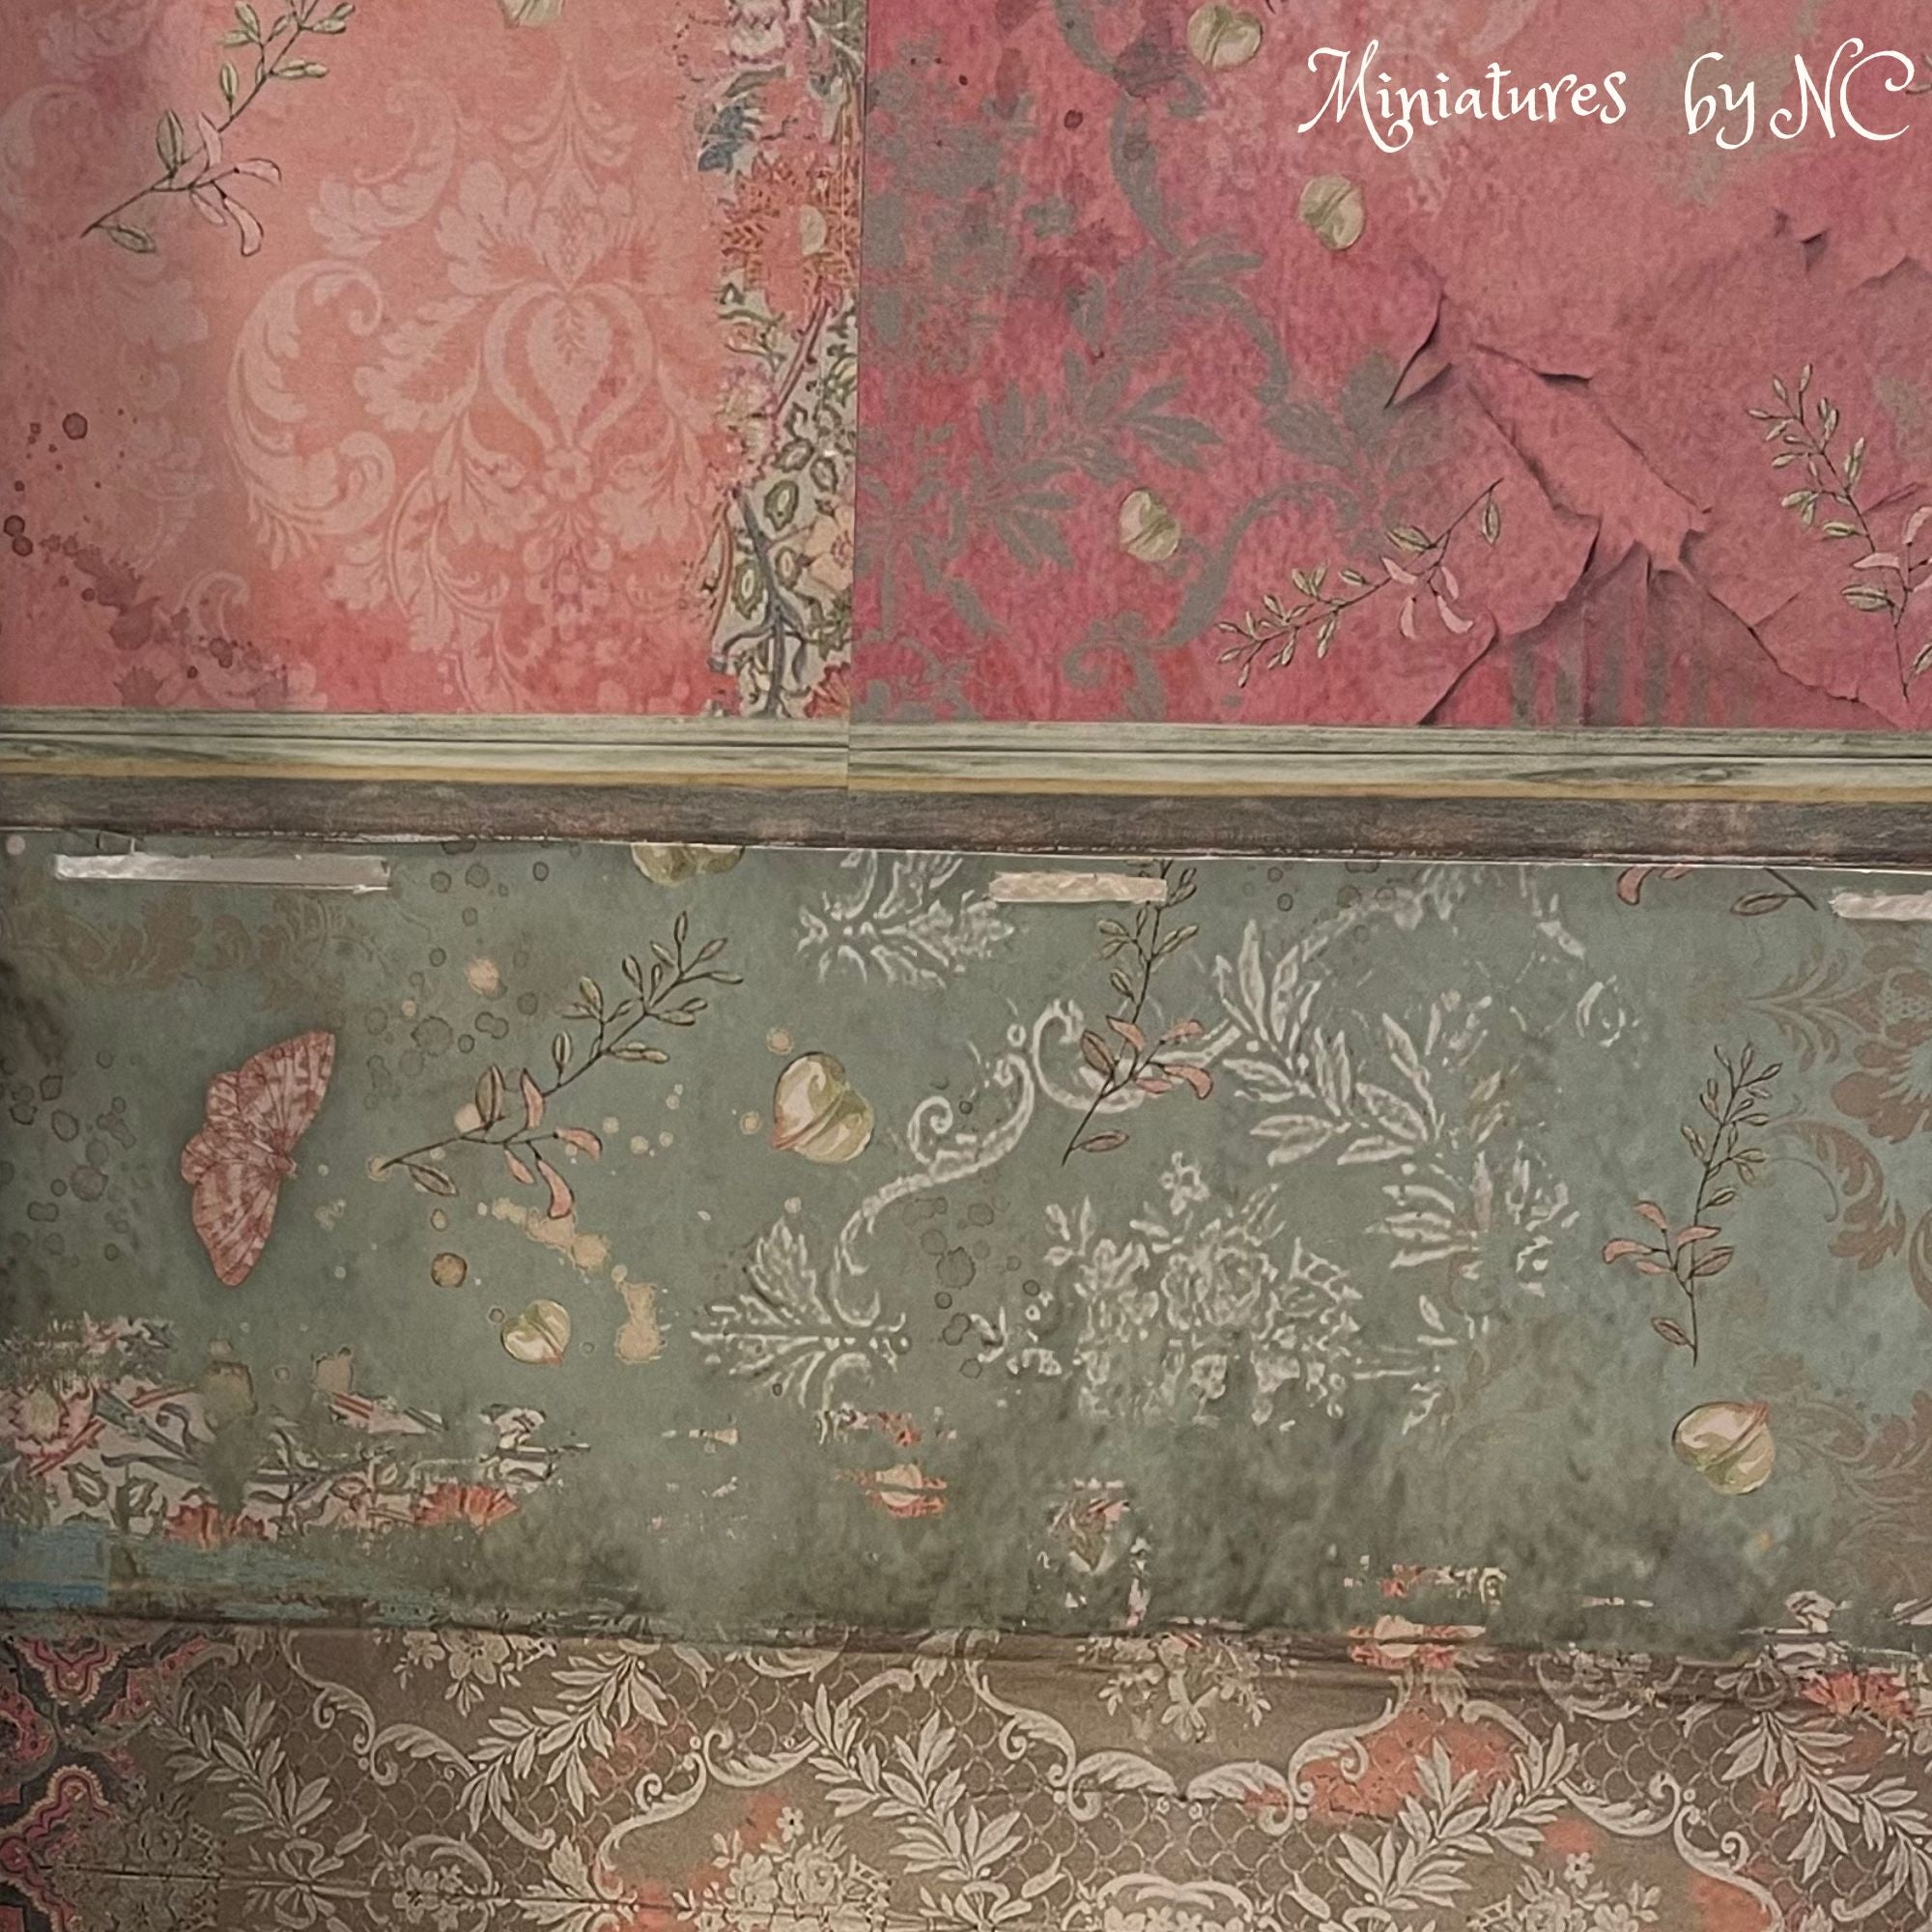 I am in love with Stamperia papers since the line comes in 12x12in sheets of paper that have different designs that match the color scheme of the pad. I have used these papers in several of my other mini houses and decided to use them here as well. The end result gives the house a very vintage and eclectic feel.
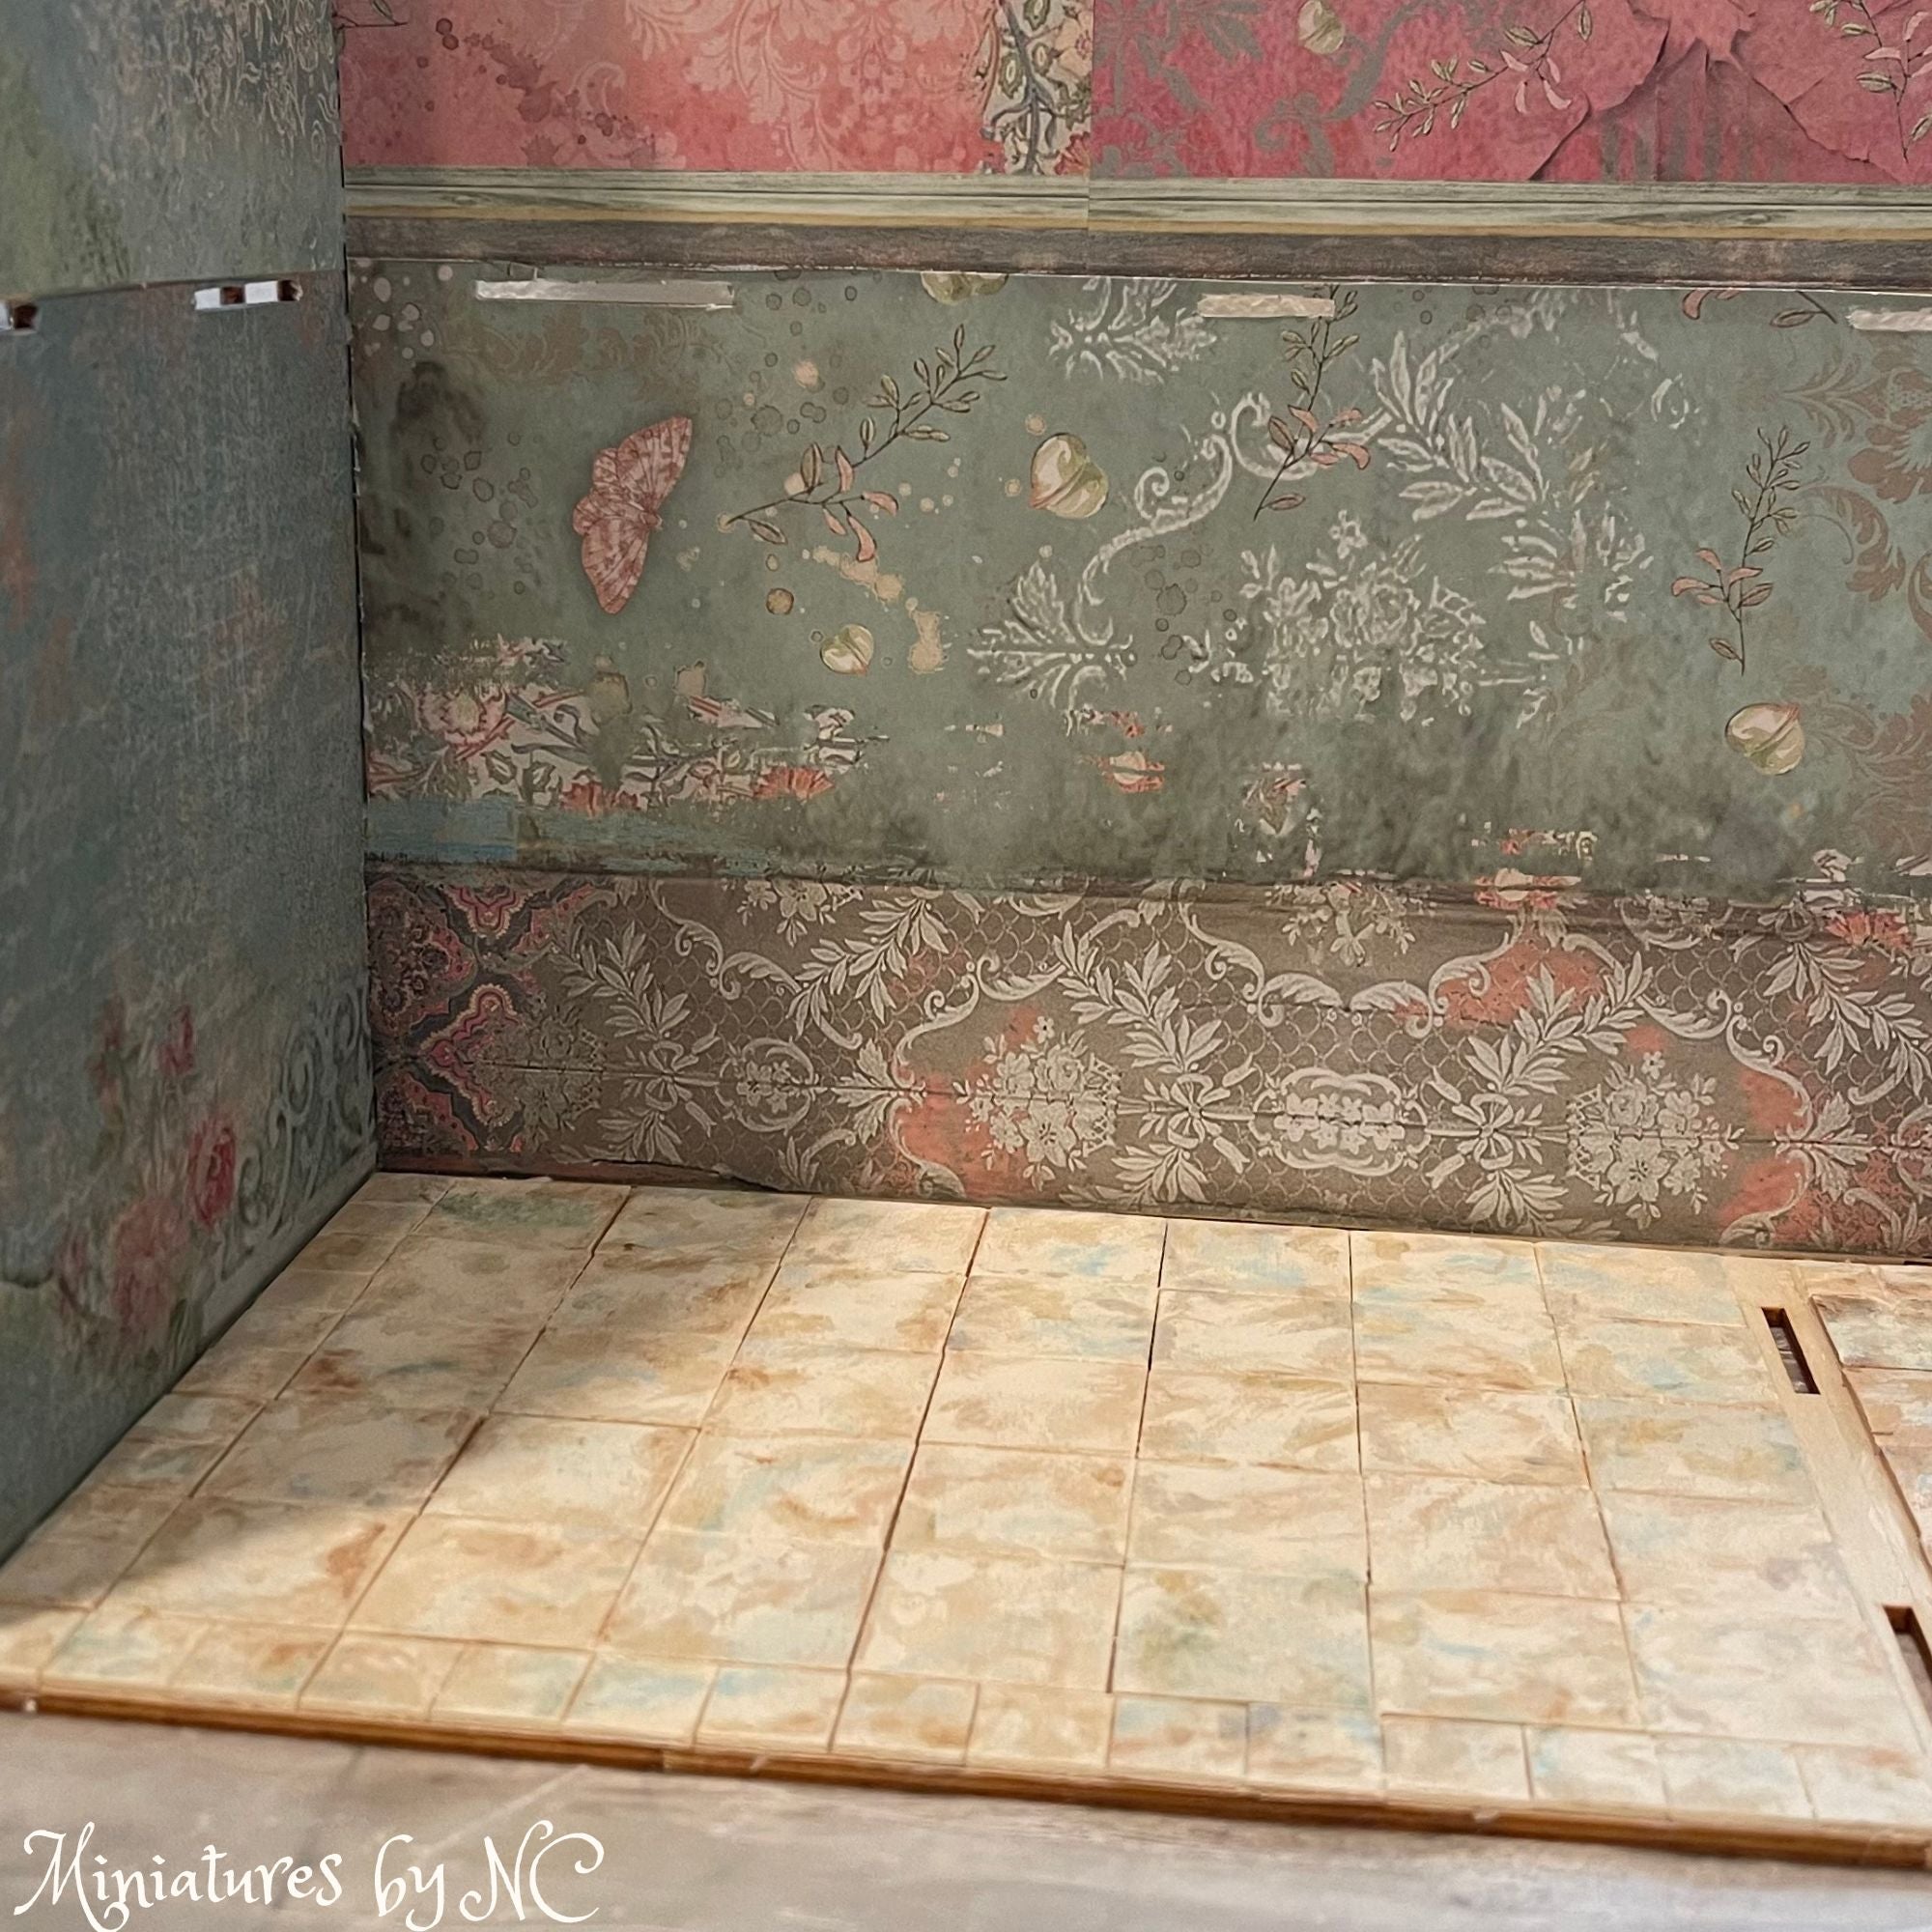
The backing for the wallpaper is double sided tape. Many strips of tape are placed down to make sure that the paper does not buckle. I think the colors work very well together, don't you agree?

It's time for some kitbashing - otherwise known as changing the kit to fit the makers needs. The hallway needs an entry to the shop and so a door had to be added. It's easy to add extra doors and windows since the kit already has those for other areas. All you have to do is select a door or window and trace the design onto your new piece of wood. You can either glue the added piece on to the existing wall for a faux look or if you want a working door, cut out the opening in the wall and insert the door or window. To make doors or windows open and close hinges will need to be added.
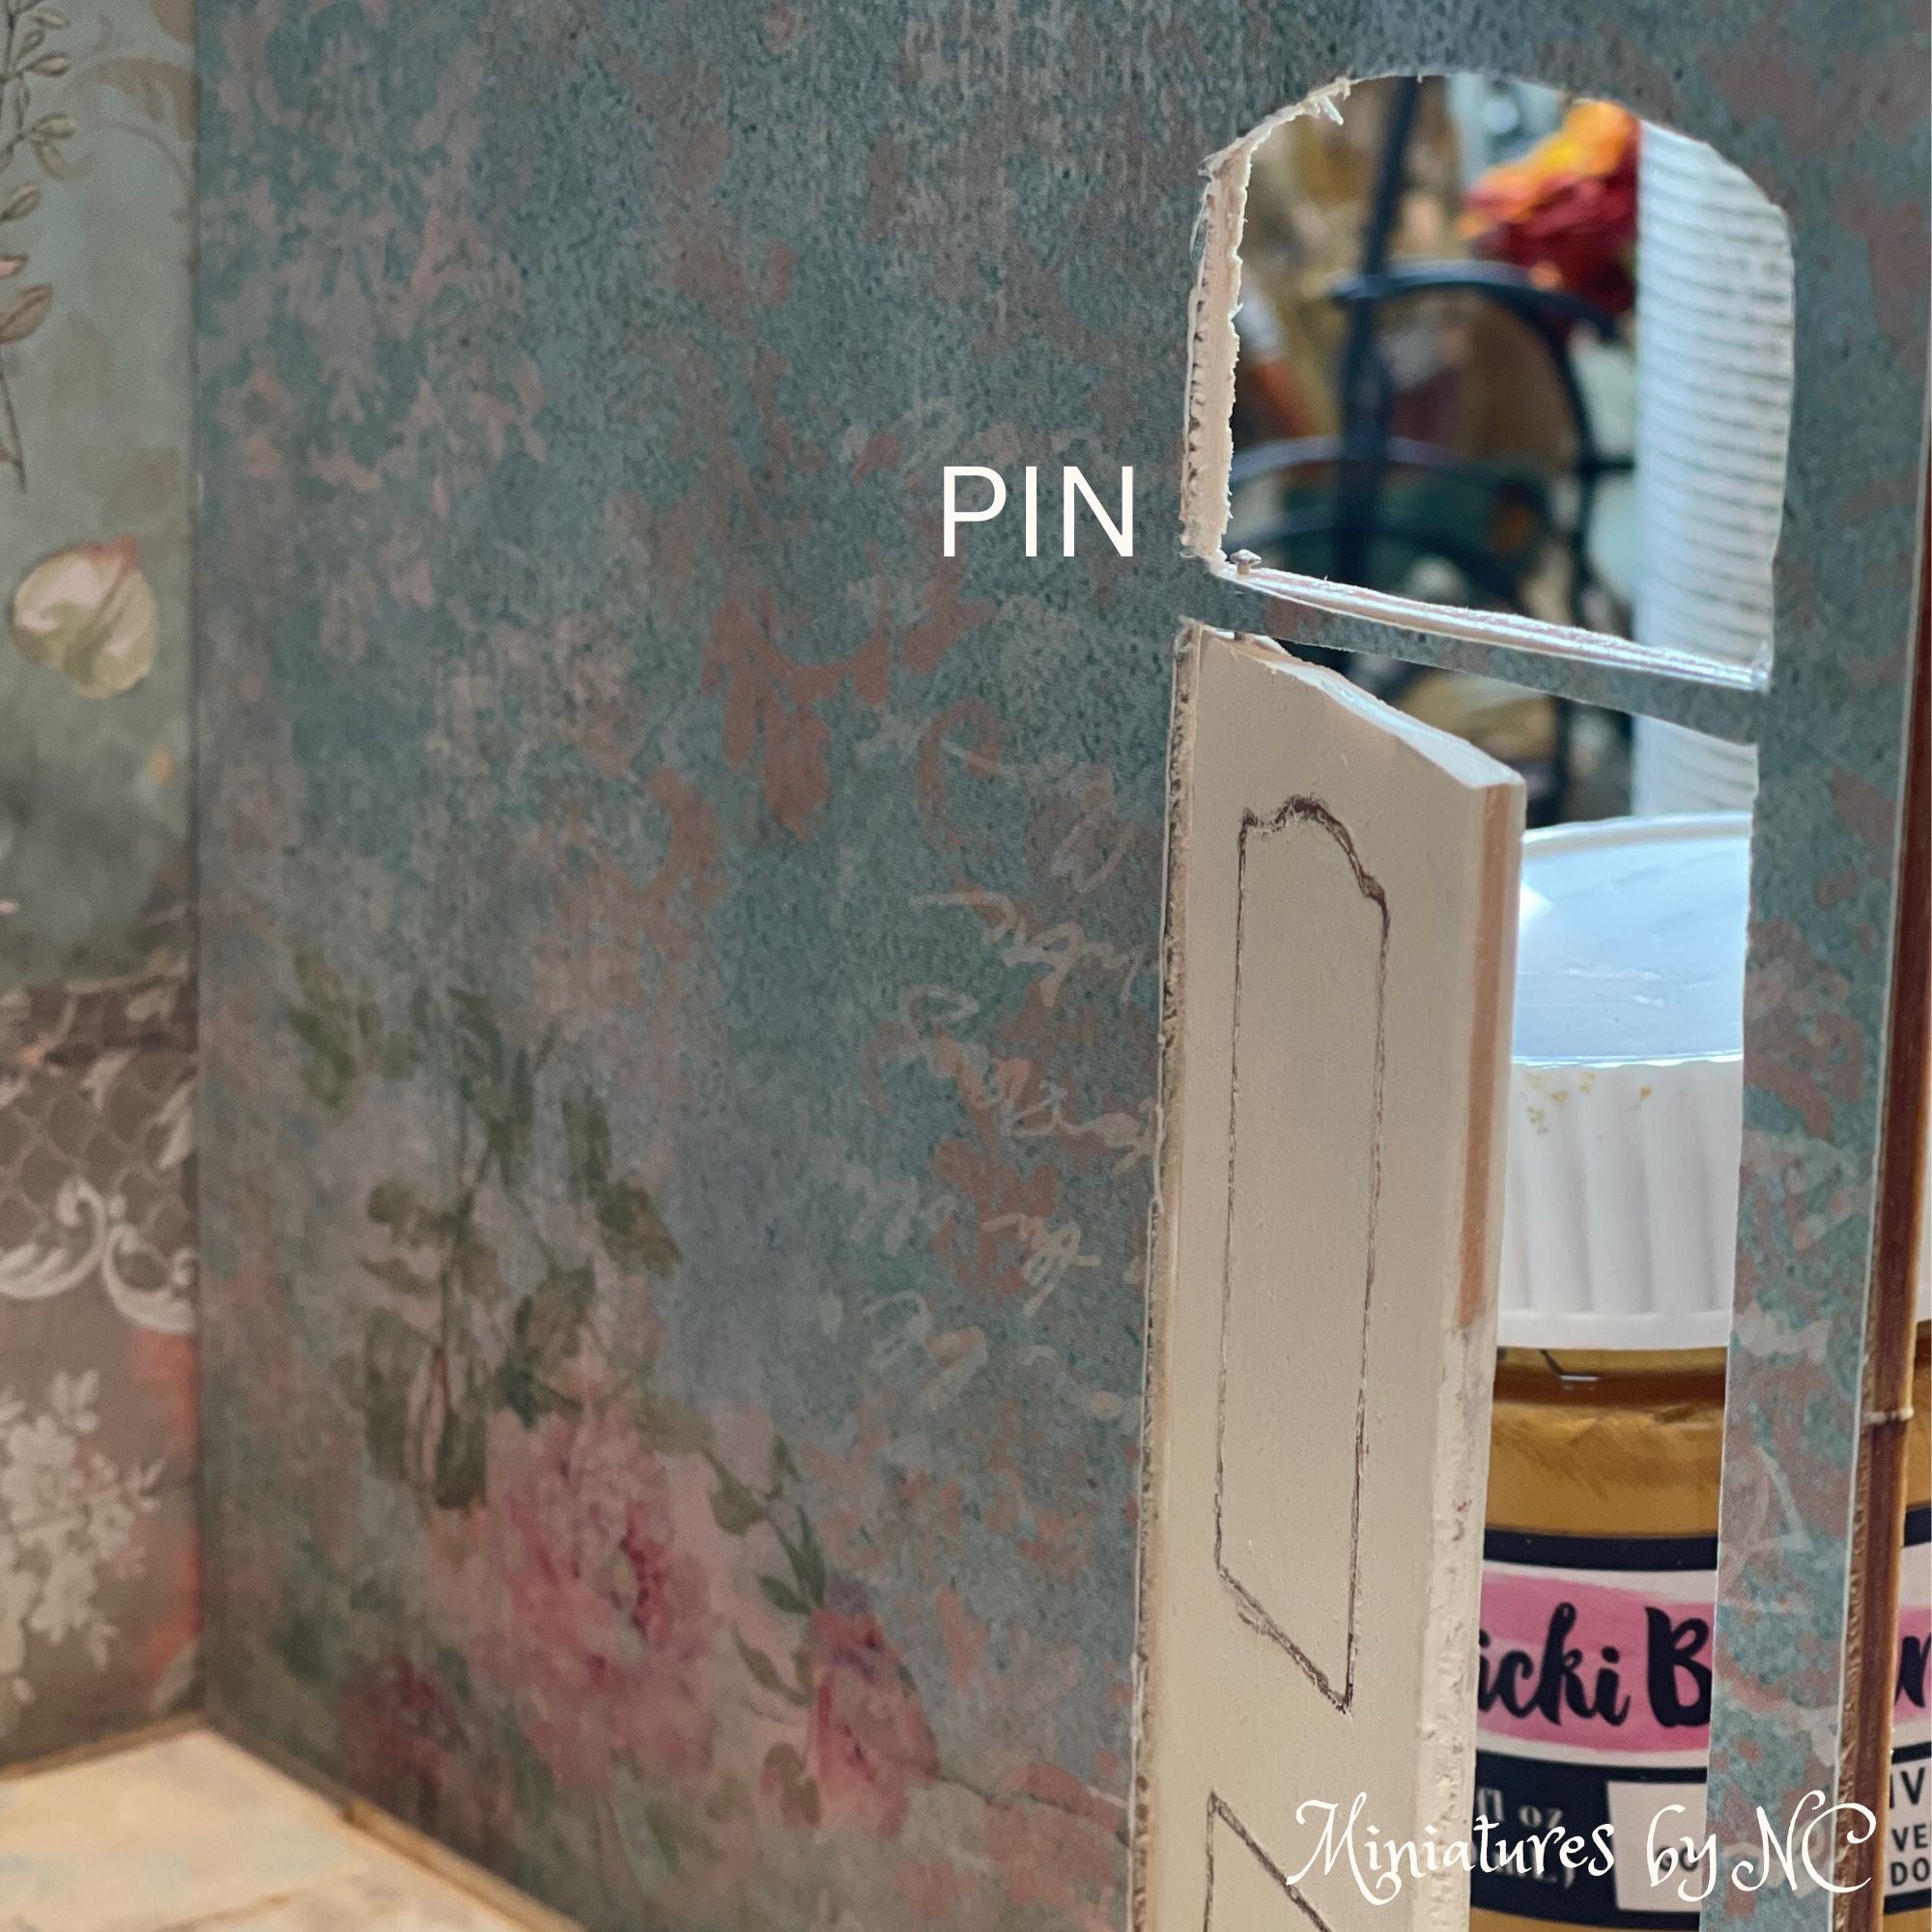
For the door hinge cut a pin in half and stick it into a corner at the top and bottom of the door.
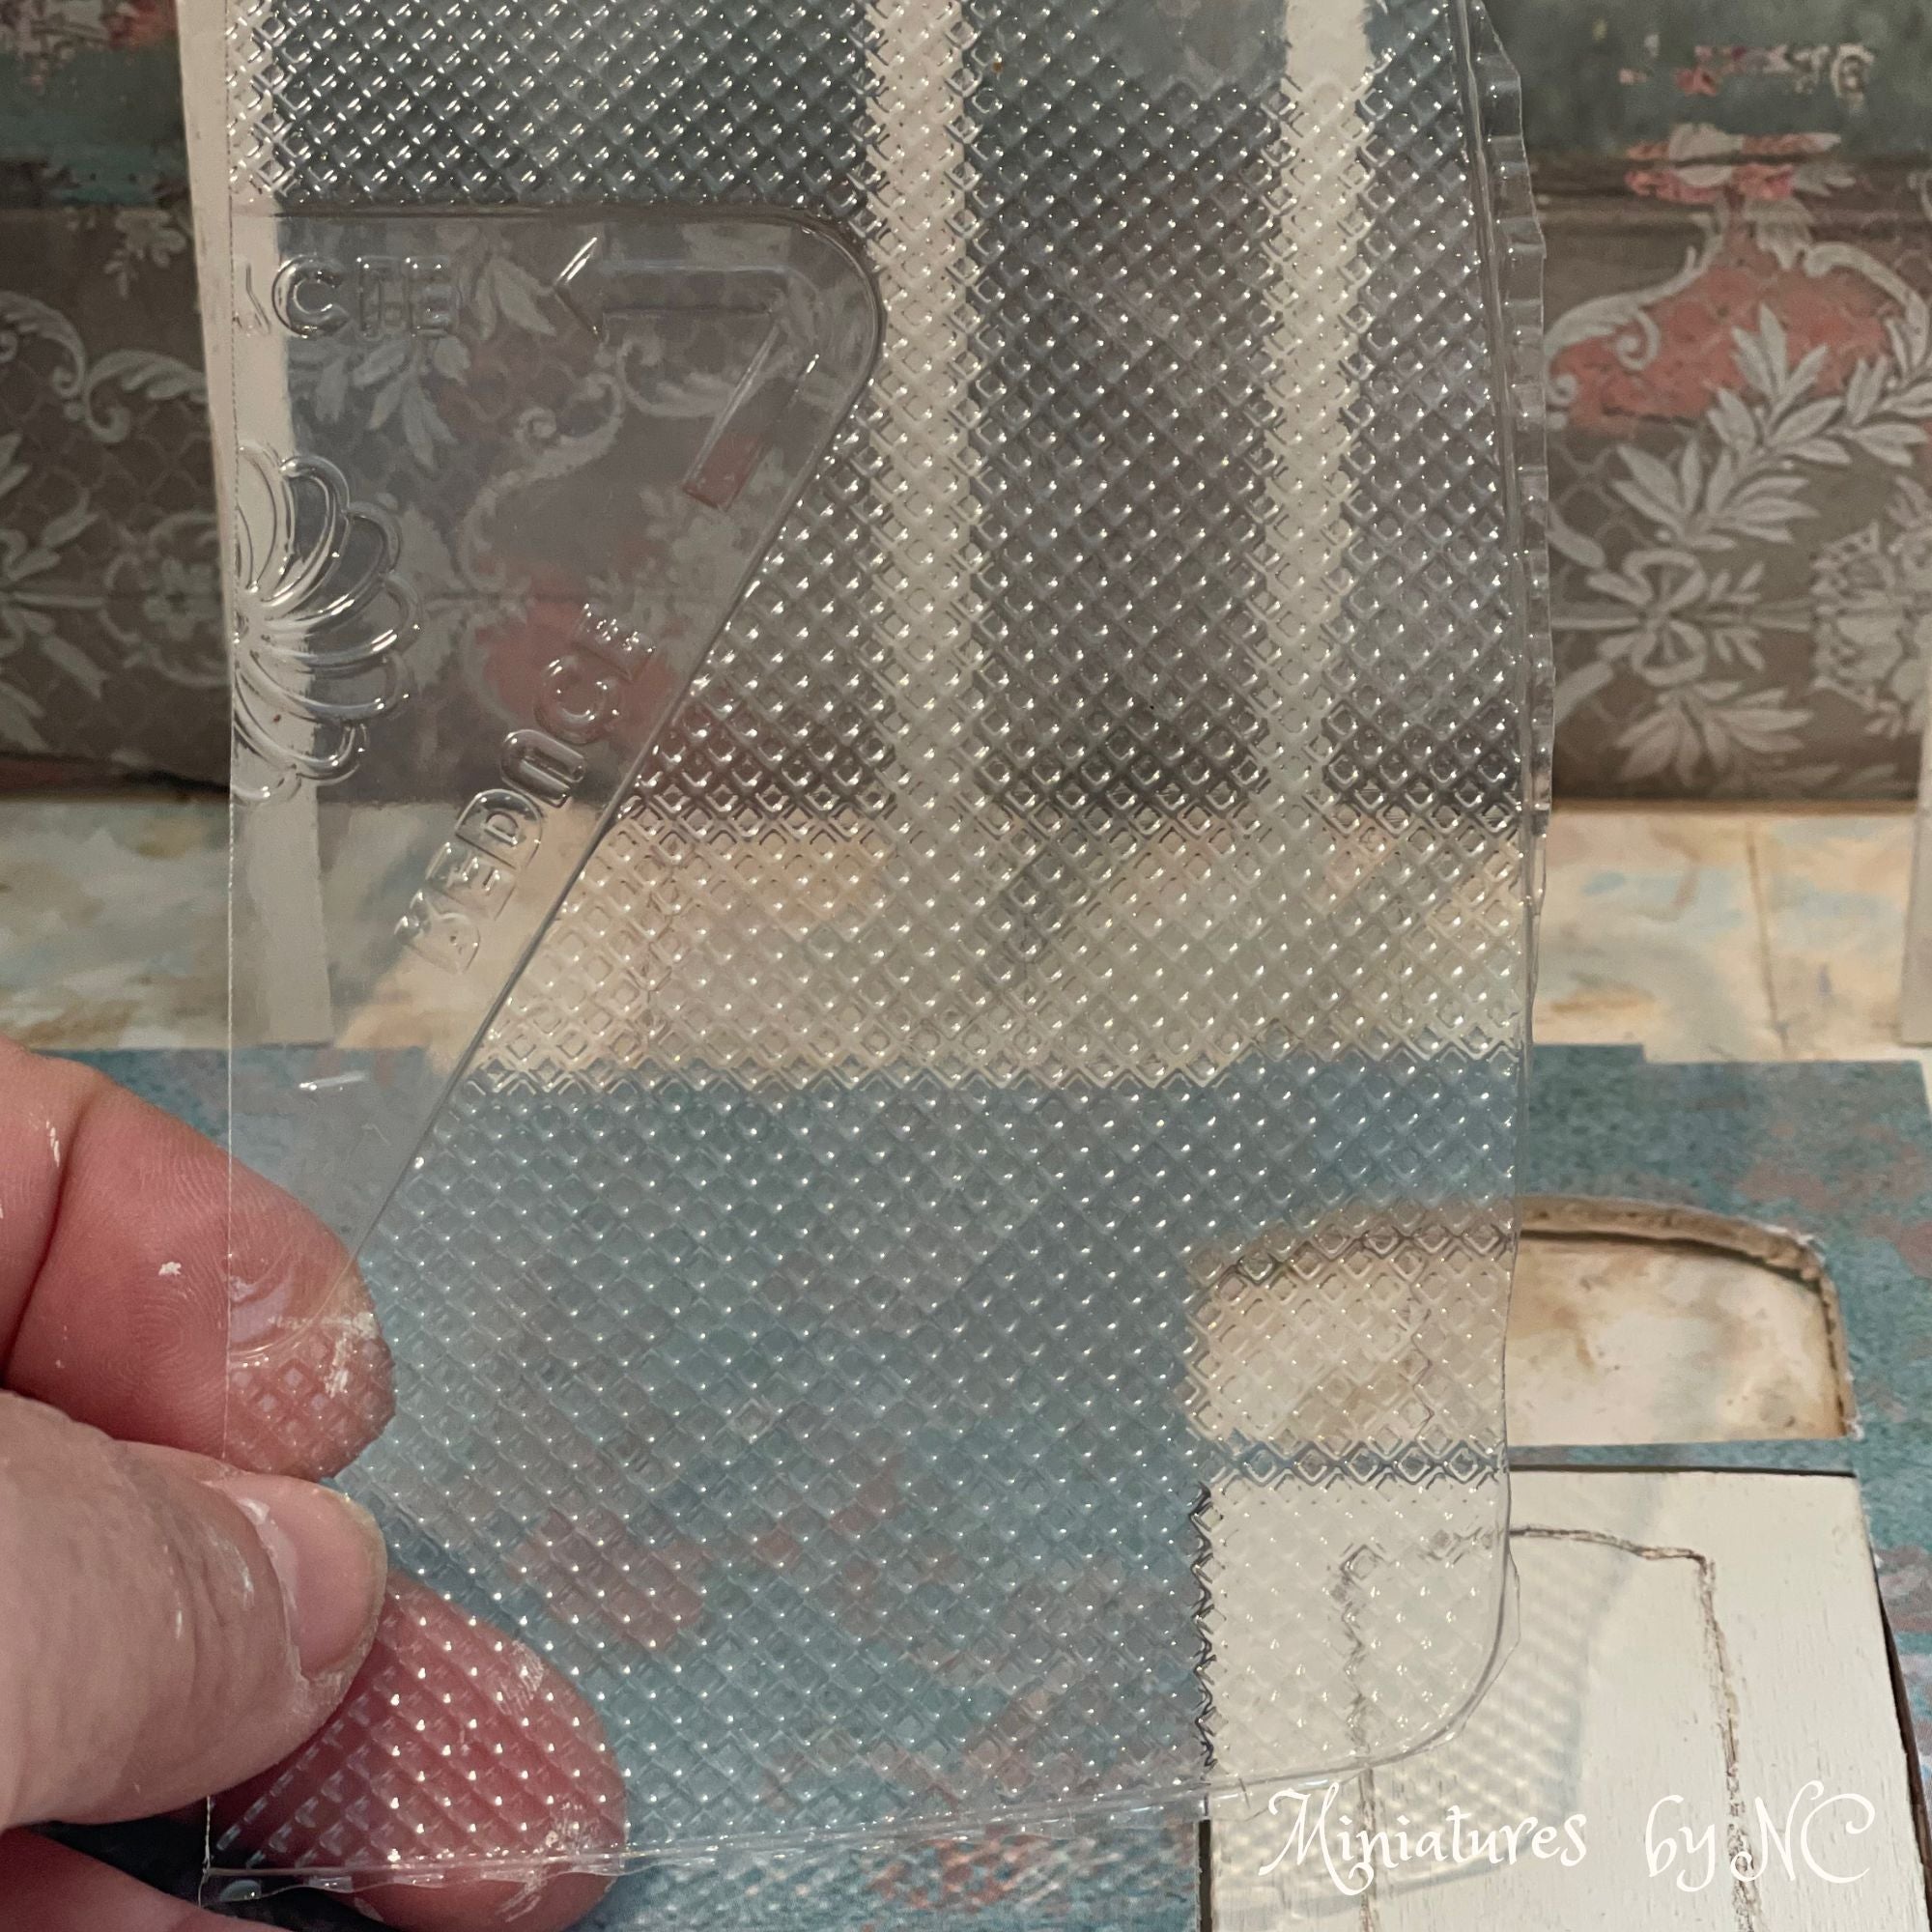
Don't throw away plastic packaging. Often pieces can be used as faux glass with interesting looking results. I cut pieces off and save them for future projects.

The result is well worth it and adds interest to the design of the door opening. I forgot to mention that the door design was first traced and then scored with a needle. That gave the door the illusion of having panels.
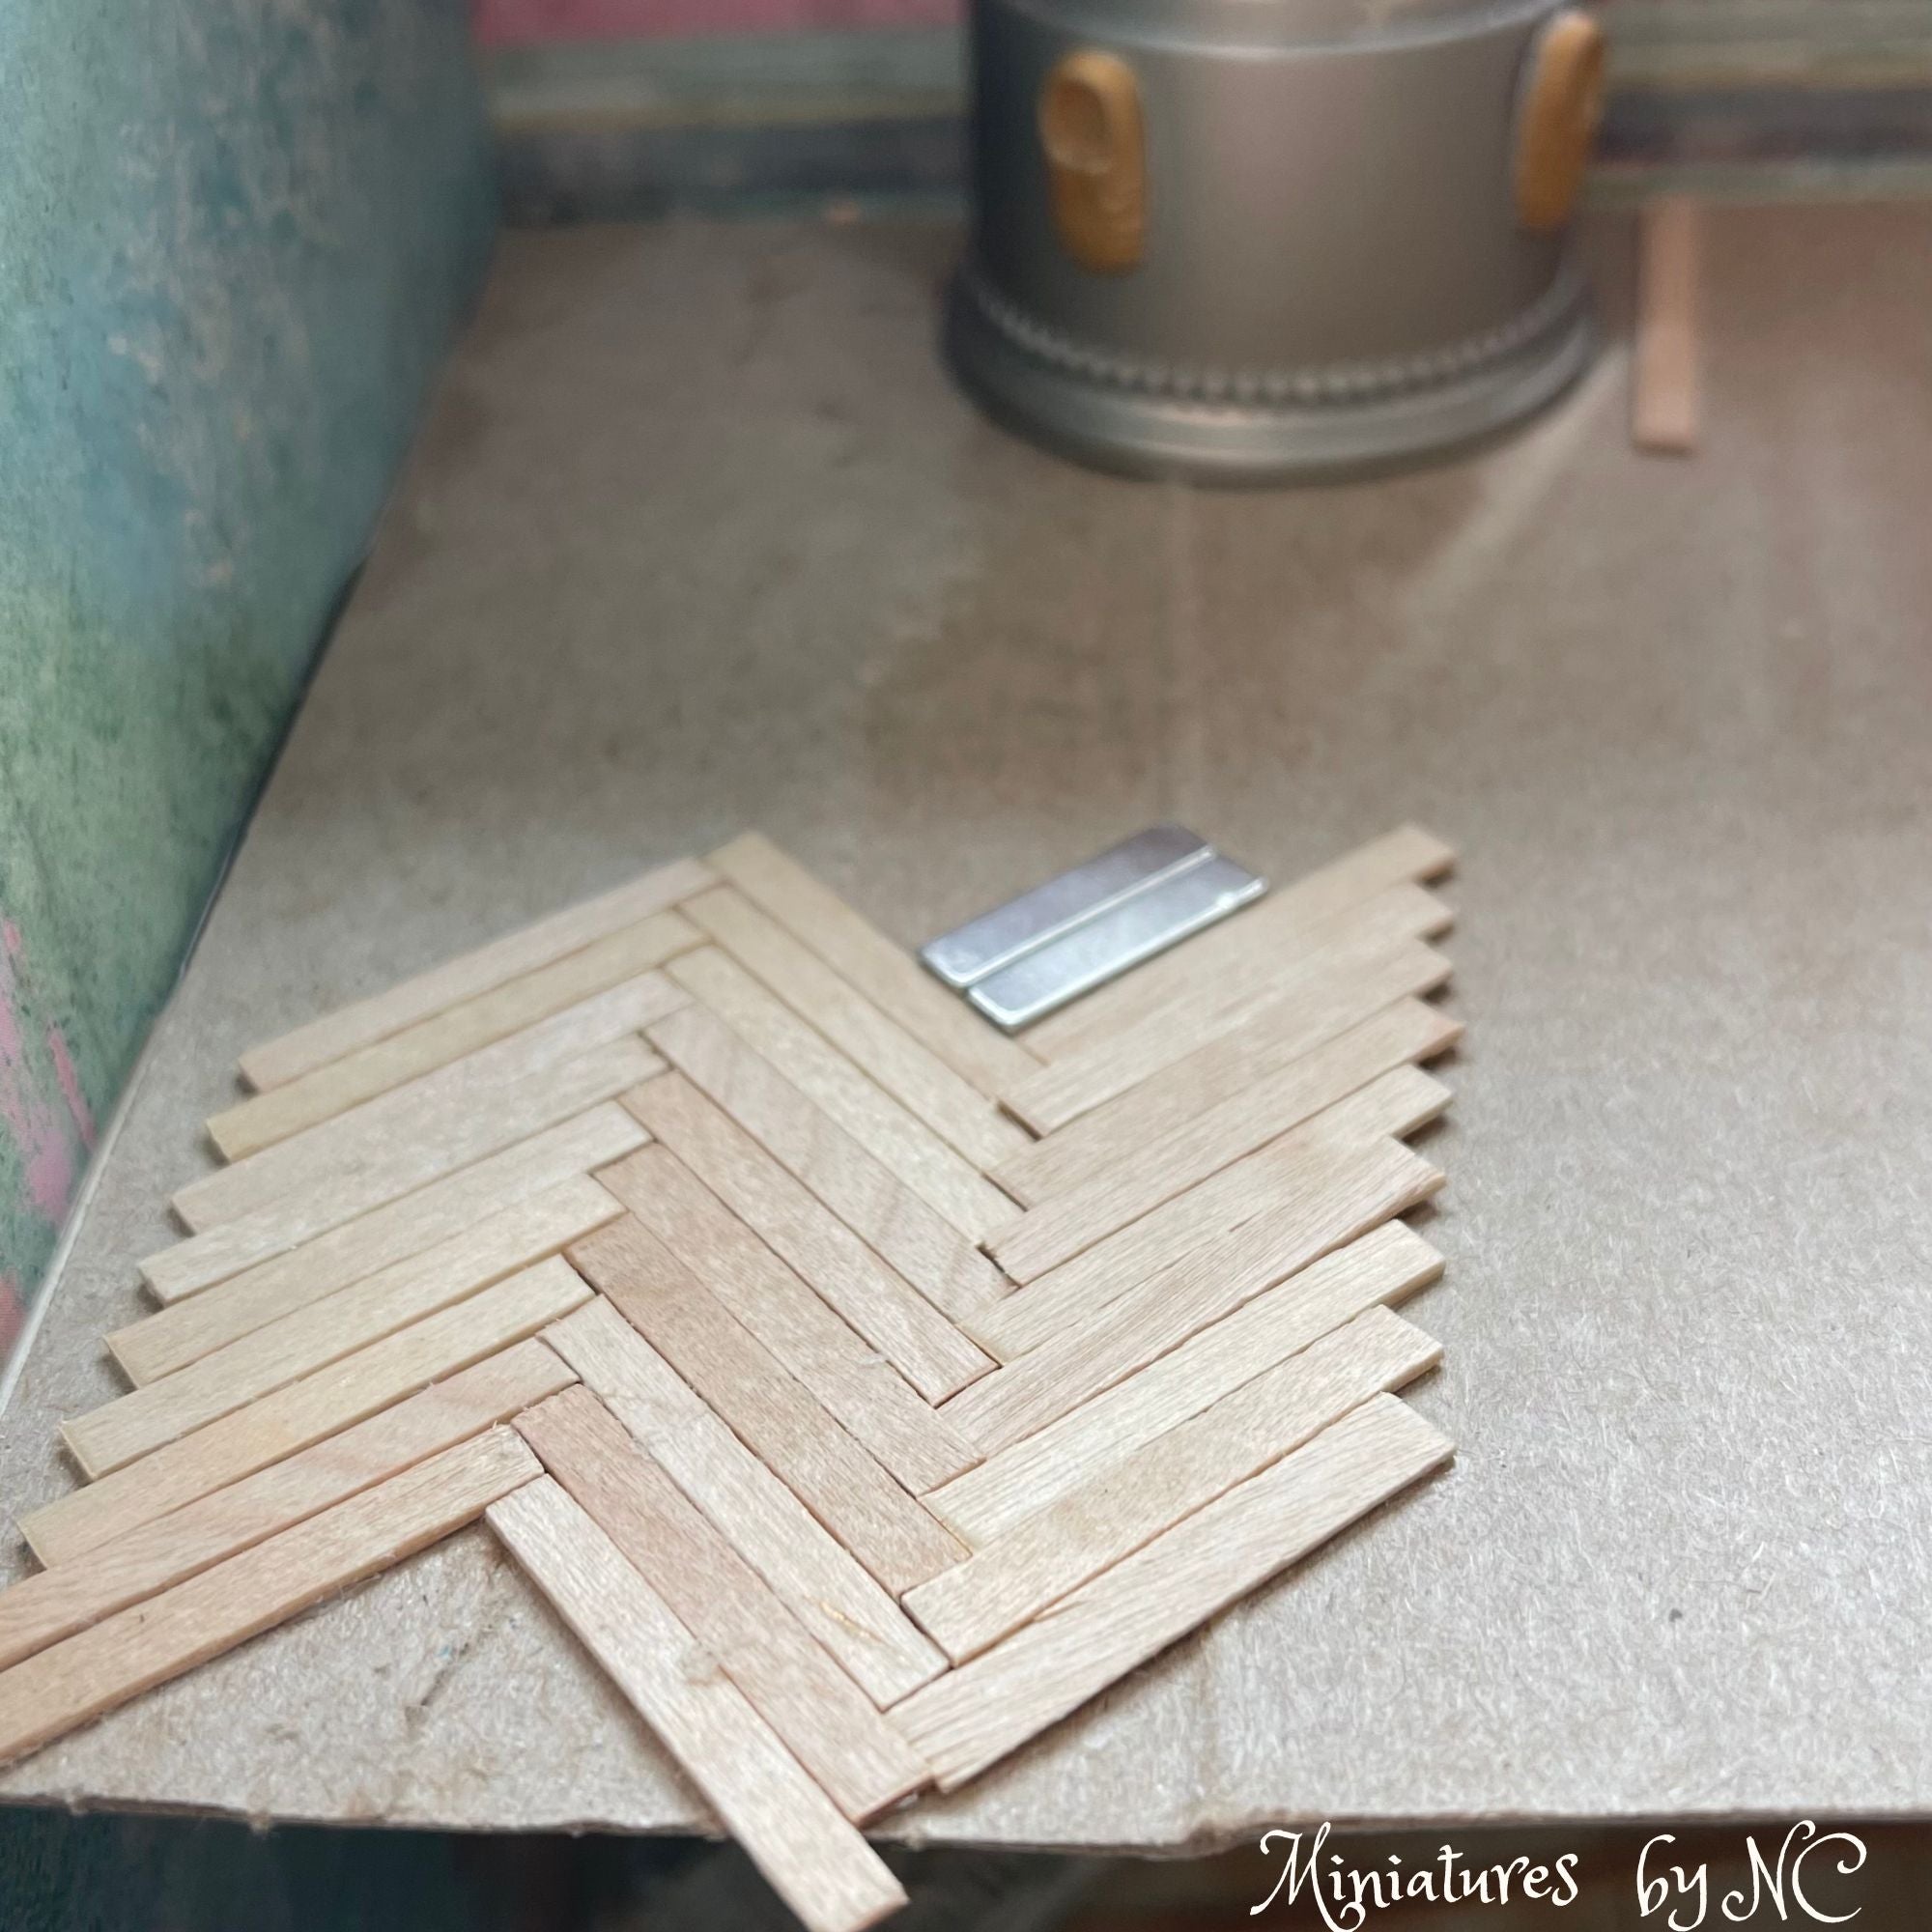
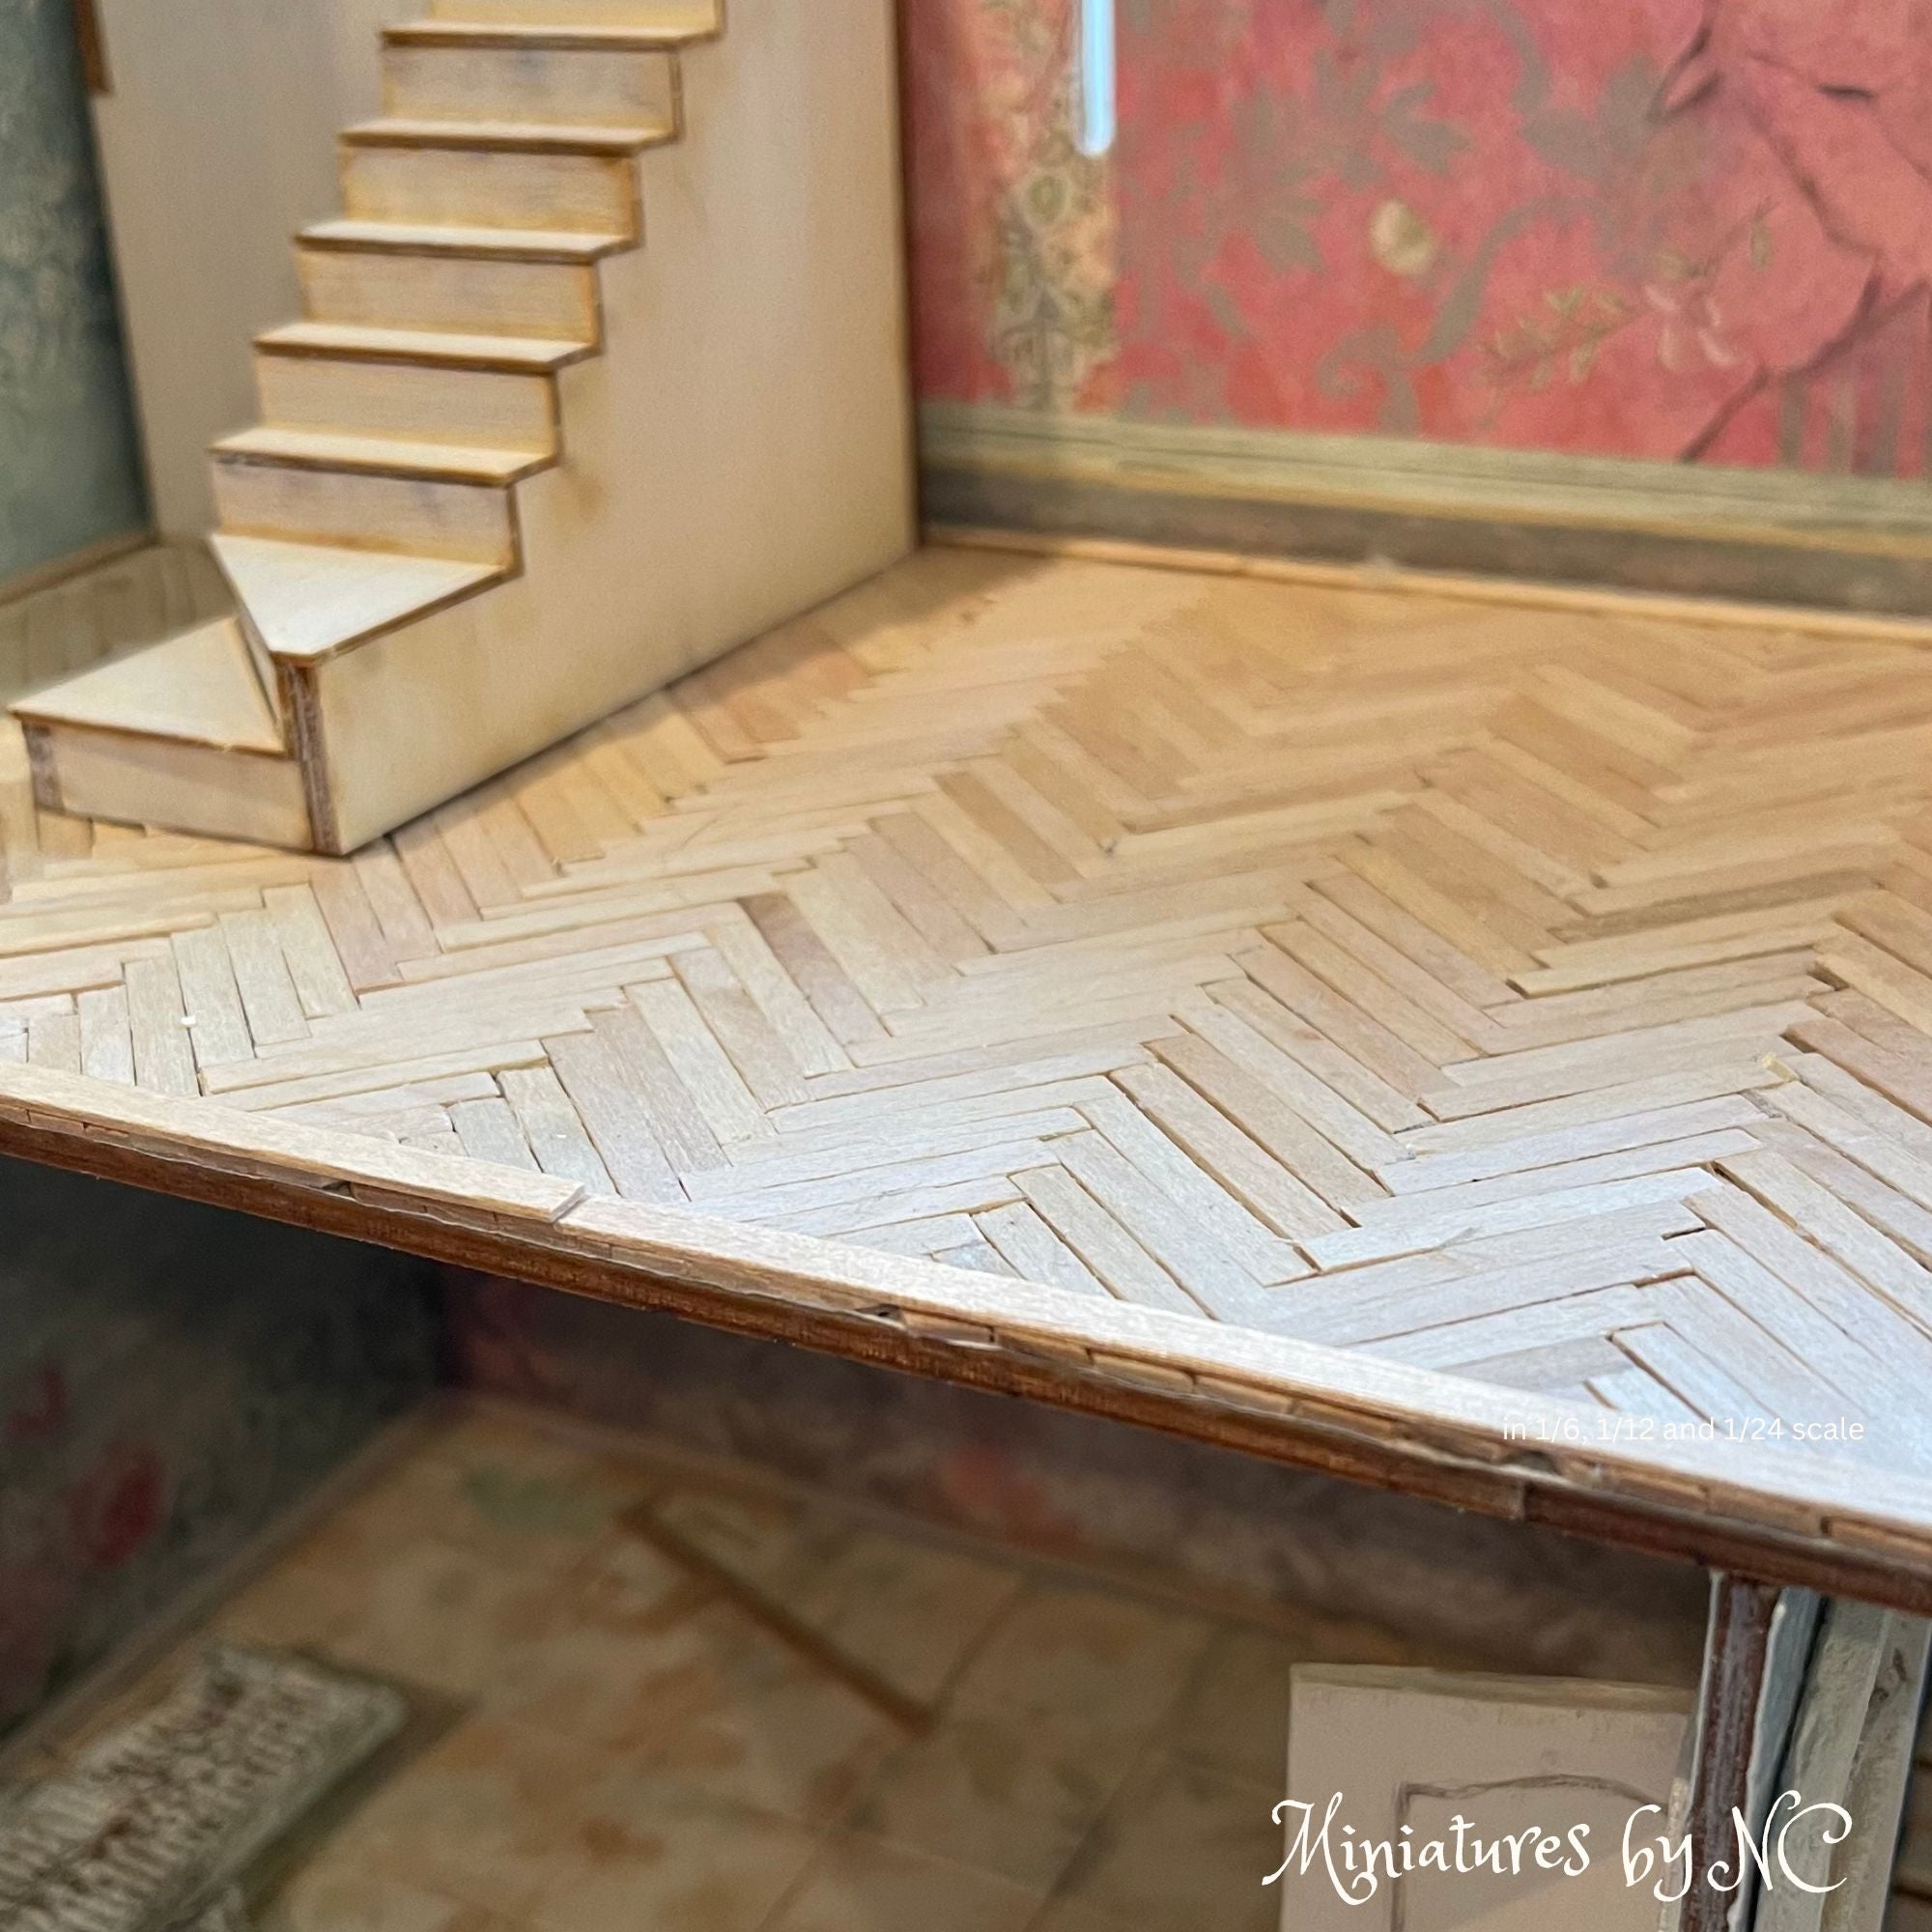
I have to admit the Herringbone design gave me trouble. I had to redo the floor three times before I got it right and I am so glad that I glued the pieces on a cardboard template rather than gluing them directly onto the balsa wood of the kit. By making a template of the base the floor can be made on a table top rather than in the house itself. Once the design is as it should be the cardboard with the wood can easily be slid into place and glued down. I used double sided tape again to keep this floor in place. Make sure that when you cut the pieces of coffee stirrers to size they are exact in length and width and meet at the same angle. I traced the floor pattern onto the cardboard on try #3 and made sure that all pieces were exactly and I do mean exactly the same size. If you don't do this the wood pieces will not fit at the seams and the floor will not look right.
I am further ahead with the kit and will post more commentary later on. The video is updated regularly though so you can follow along.
Update:
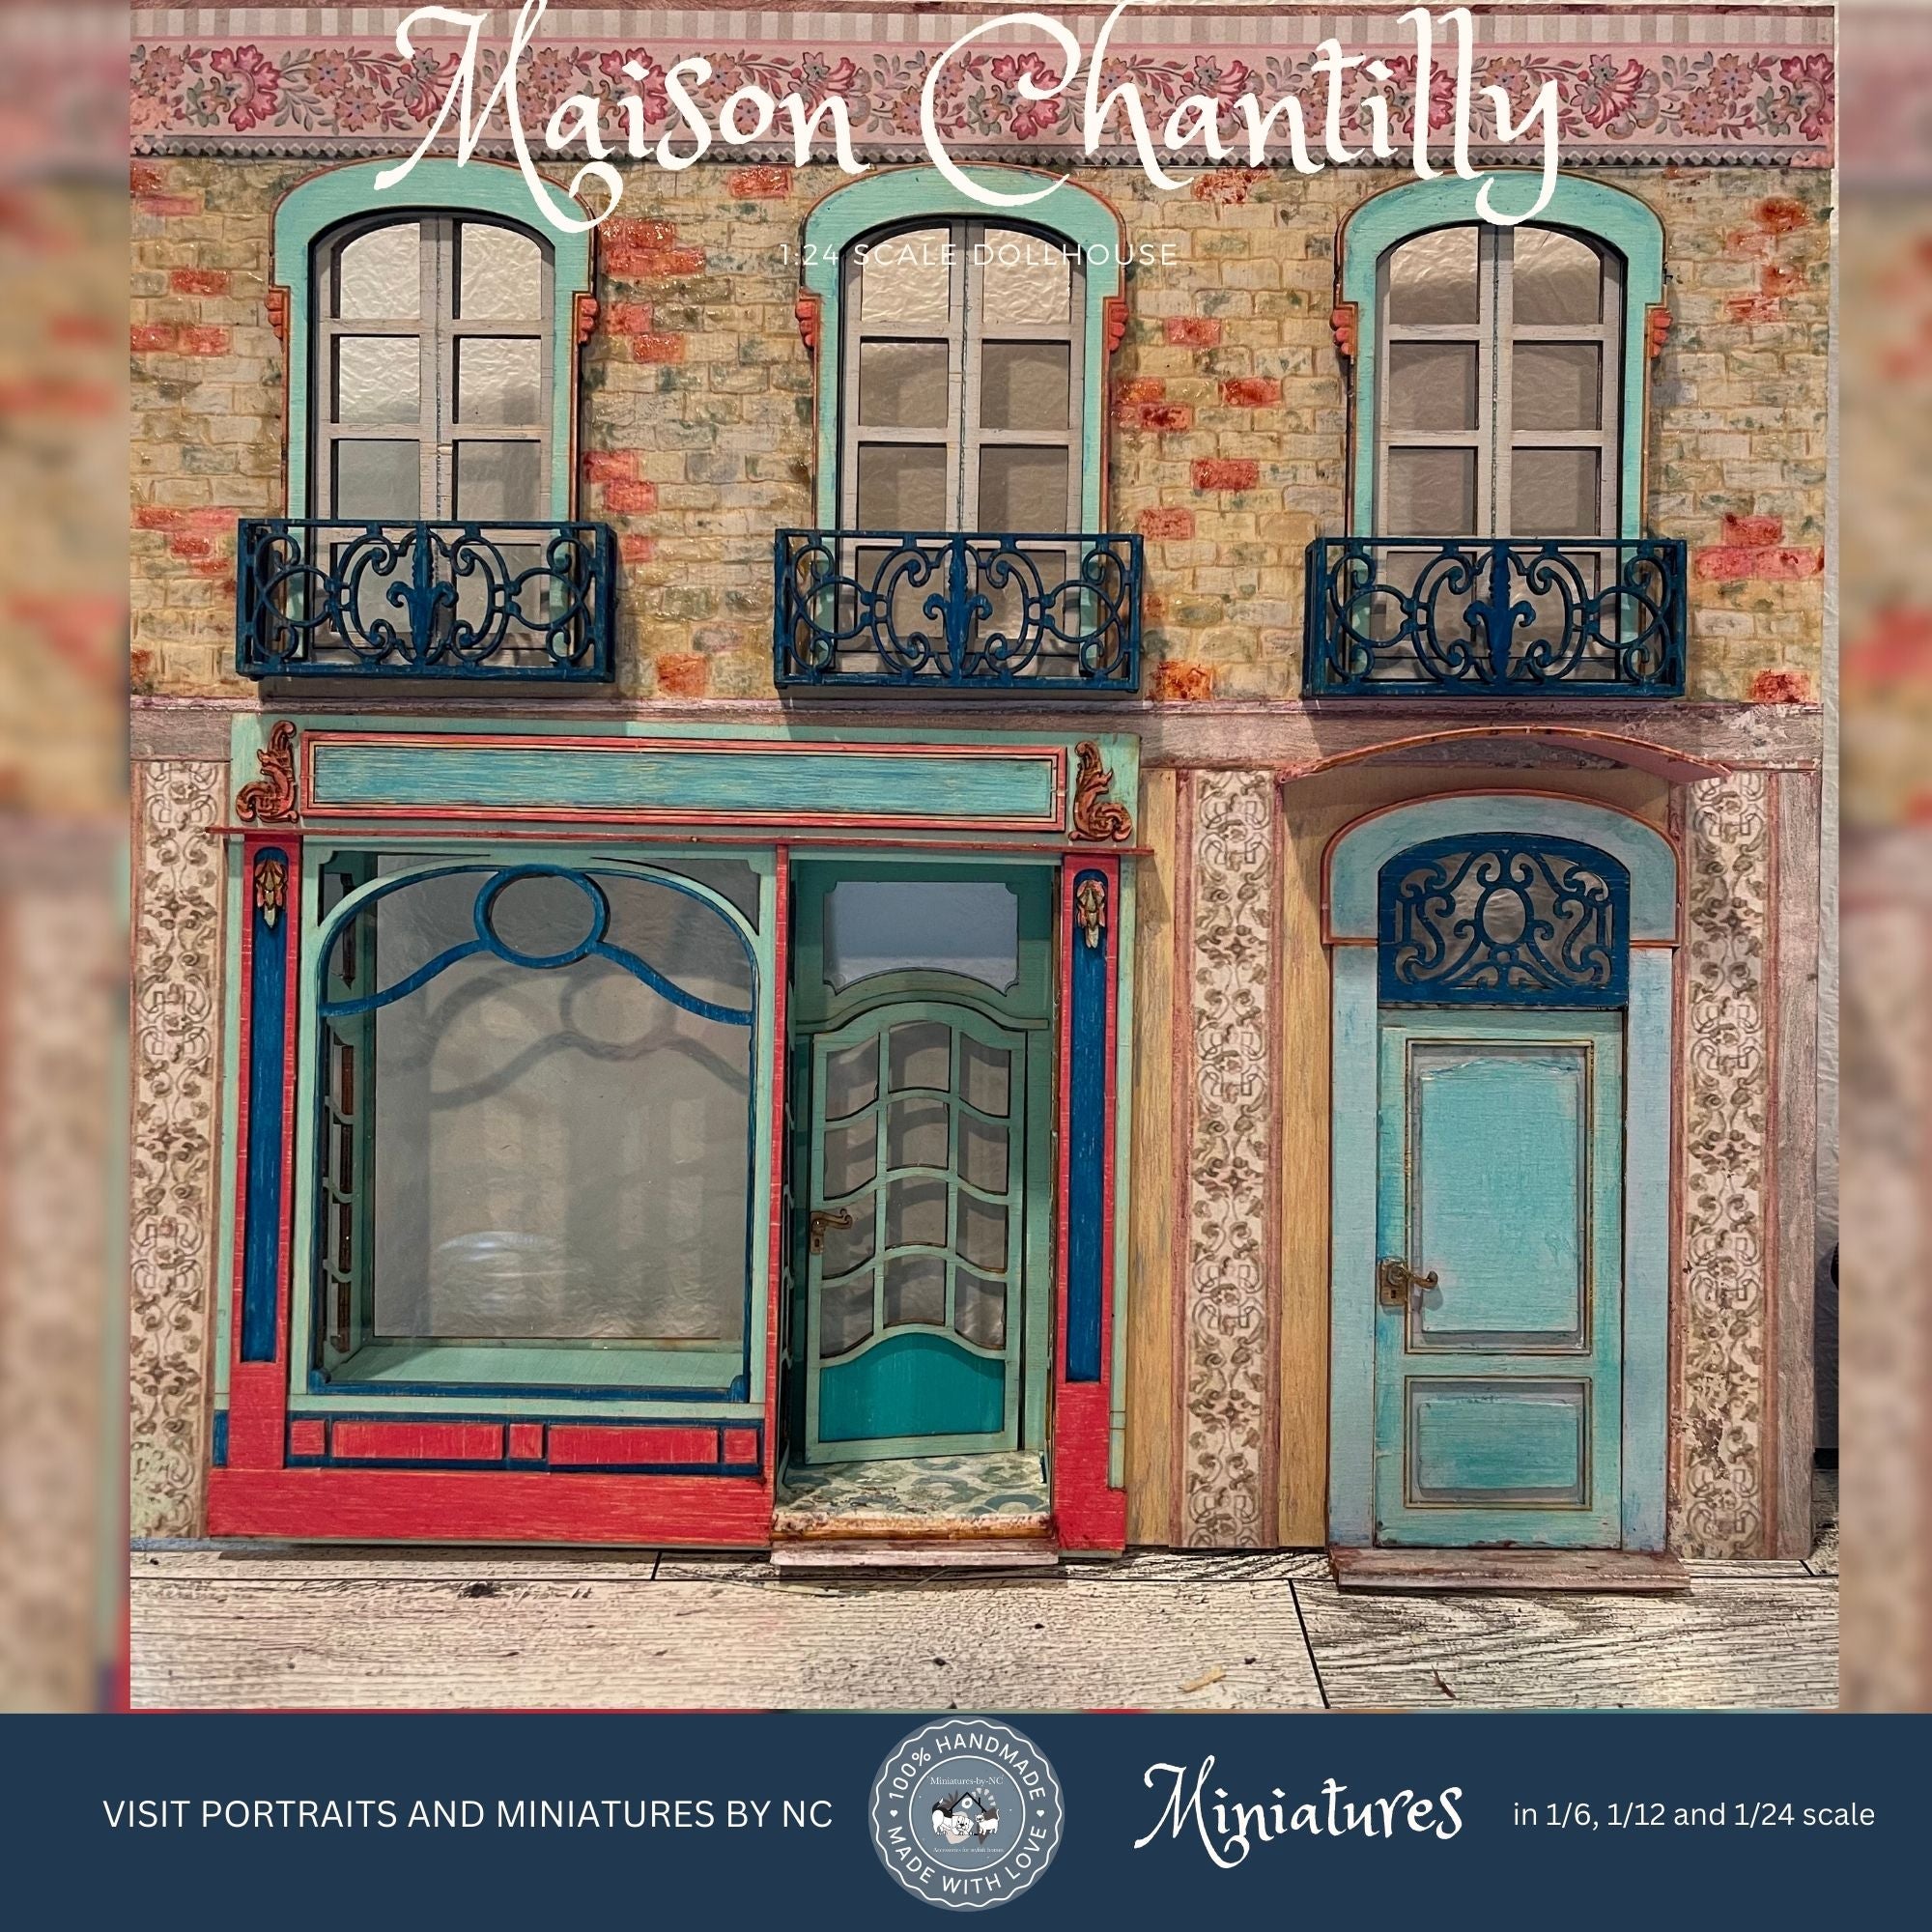
The house has been finished and I can not be happier with the way it has turned out. I decided to take color and design cues from my favorite Stamperia papers and had a lot of fun making it work for the facade of this house.
I decided to order furniture for this house and finish it the way I like it. I have written a tutorial on "How to achieve a better finish on models I have to put la Maison Chantilly to the side for now to concentrate on a new diorama commission of a dorm room replica. We will visit la Maison Chantilly again to finish the store portion. In the meantime I would love to hear what you think of Maison Chantilly.