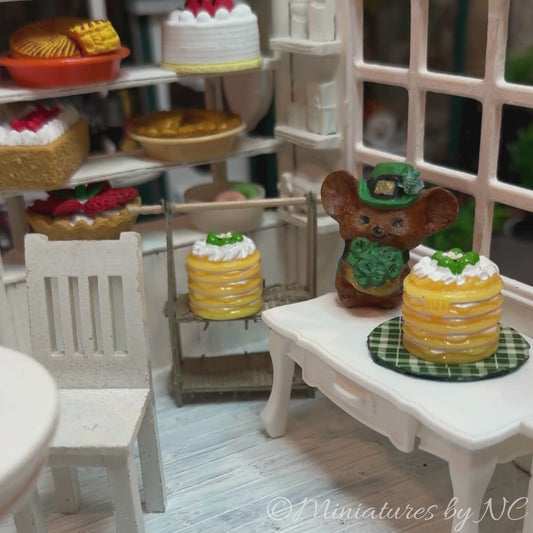
🏠 Bringing Memories to Life: The Miniature Living Room🏠 Exploring Room Box Option

Today, let’s dive into room box options for miniature scenes. Traditionally, these scenes have been displayed in wooden cases, known as roomboxes. While wooden boxes have a classic, sturdy look, they come with some significant drawbacks. At around 4 pounds, they are quite heavy, and it’s challenging to find a box where the wood isn’t slightly warped. When designing a space that needs to fit into a small box, every millimeter counts, and warping is just unacceptable.
Another downside is that wooden boxes typically only allow viewing from the front. This can make the interior dark and obscure the intricate details you’ve worked so hard to create. That’s why I’ve been exploring alternatives.

Acrylic display boxes offer a fantastic solution. They are much lighter and provide a clear view from all sides. In some cases, when walls aren’t needed, the scene can be viewed from every angle. For dioramas where walls are essential, I avoid creating a ceiling that would darken the interior. Instead, I add beams to conceal the light fixture wiring, ensuring plenty of light can reach inside the box.
Acrylic boxes are lightweight, do not warp, and are perfect for displaying detailed miniature scenes. They truly elevate the viewing experience, allowing all your hard work to be appreciated from every angle.

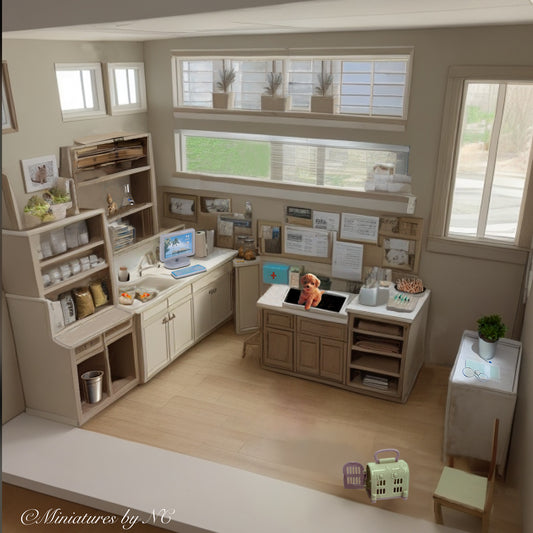
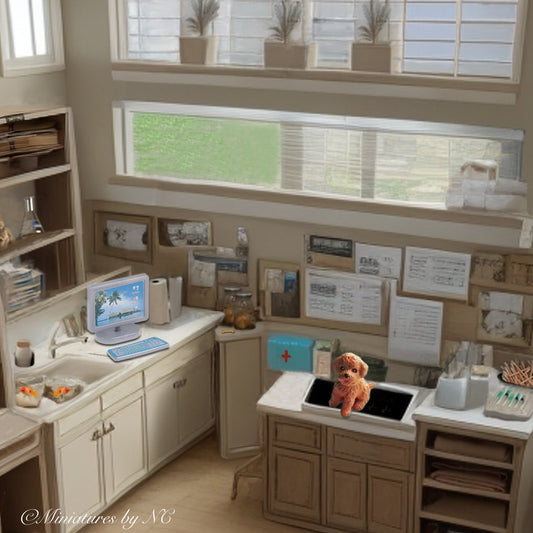
My client chose this Acrylic display case that has a removable top and I like to show you how the room scene is created when walls and ceiling lights are needed.
I’m using thick craft board to create free-standing walls for this miniature room scene. This material is sturdy and won’t buckle, making it perfect for this project. Here are some tips and tricks to add stability to the walls:
For the walls, I used a heavy craft board that stands up well and maintains its shape. I’ll have to look up the exact name later. Instead of glue, which can leave marks, I attached the sides using double-sided tape. This method keeps the construction clean and neat. To further reinforce the structure, I added baseboards.

Here’s the process step-by-step:
-
Cutting the Boards:
- Follow the contours of your miniature room box carefully and cut the craft boards accordingly.
- Precision is key to ensure all pieces fit together seamlessly.
-
Assembling the Walls:
- Use double-sided tape to attach the sides of the walls. This avoids the mess and marks that glue can leave.
- Ensure the tape is evenly applied to prevent any gaps or misalignment.
-
Reinforcing with Baseboards:
- Add popsicle sticks and coffee stirrer wood sticks to create baseboards and ceiling boards.
- Glue these in place using a strong adhesive. This not only adds a decorative touch but also frames and supports the walls, enhancing their stability.

Adding Support Beams for Light Fixtures
-
Creating Support Beams:
- Materials Needed: Craft board or balsa wood strips, strong adhesive, small screws or nails (optional).
- Cutting Beams: Cut the craft board or balsa wood strips to the desired length, ensuring they fit snugly between the walls of your miniature room.
- Positioning Beams: Decide where you want the light fixtures to be placed. Attach the beams horizontally across the top of the walls at these positions.
- Securing Beams: Use a strong adhesive to attach the beams firmly to the walls. For extra stability, consider using small screws or nails, especially if the fixtures are heavy.
-
Installing Light Fixtures:
- Drilling Holes: If your light fixtures require wiring, drill small holes through the beams for the wires to pass through.
- Attaching Fixtures: Secure the light fixtures to the beams using adhesive or tiny screws, ensuring they are positioned correctly and securely.
- Concealing Wires: Run the wires along the beams and down the corners of the walls, using additional beams or trim pieces to conceal them for a clean look.
Additional Stability Tips:
- Consider using corner brackets or small L-shaped pieces cut from the craft board to further stabilize the walls.
- If the scene is particularly intricate, adding a back panel can provide extra support while keeping the front open for viewing.
With these techniques, your free-standing walls will be sturdy, well-supported, and visually appealing.