How to Make a 1/12 Scale Versailles Parquet Floor for your Dollhouse

Have you ever wanted to add that intricate looking Versailles Parquet Floor to your dollhouse, but were too intimidate by the complexity of the design? I was until I sat down and really studied the design in The Big Book of a Miniature House . I made a video with step by step instructions on how I made the floor, plus added a free printable template to make it easier for you to recreate this lovely floor design.
The free printable PDF can be uploaded to Cricut Design Space, so that you can easily resize the floor tiles, if needed.
You will need to convert the PDF file to a PNG file for Cricut Design space. Here is an easy video to show you how to do it.
Once you upload the file you can then either print and cut or just cut the pieces on card stock or wood. Bass wood works the best if you tape down the sides really well on the purple mat and use the knife blade.

If you do not have a Cricut machine you can use card stock, thin wood or even coffee stirrers. As you will see in this tutorial I actually decided to make my floor out of card stock which I later painted to add extra texture.
To begin you will need the following items

If you are using card stock you can use any suitable paper glue. I used Aleenes Tacky Glue and it worked really well. If you are using wood I recommend using a good wood glue instead.

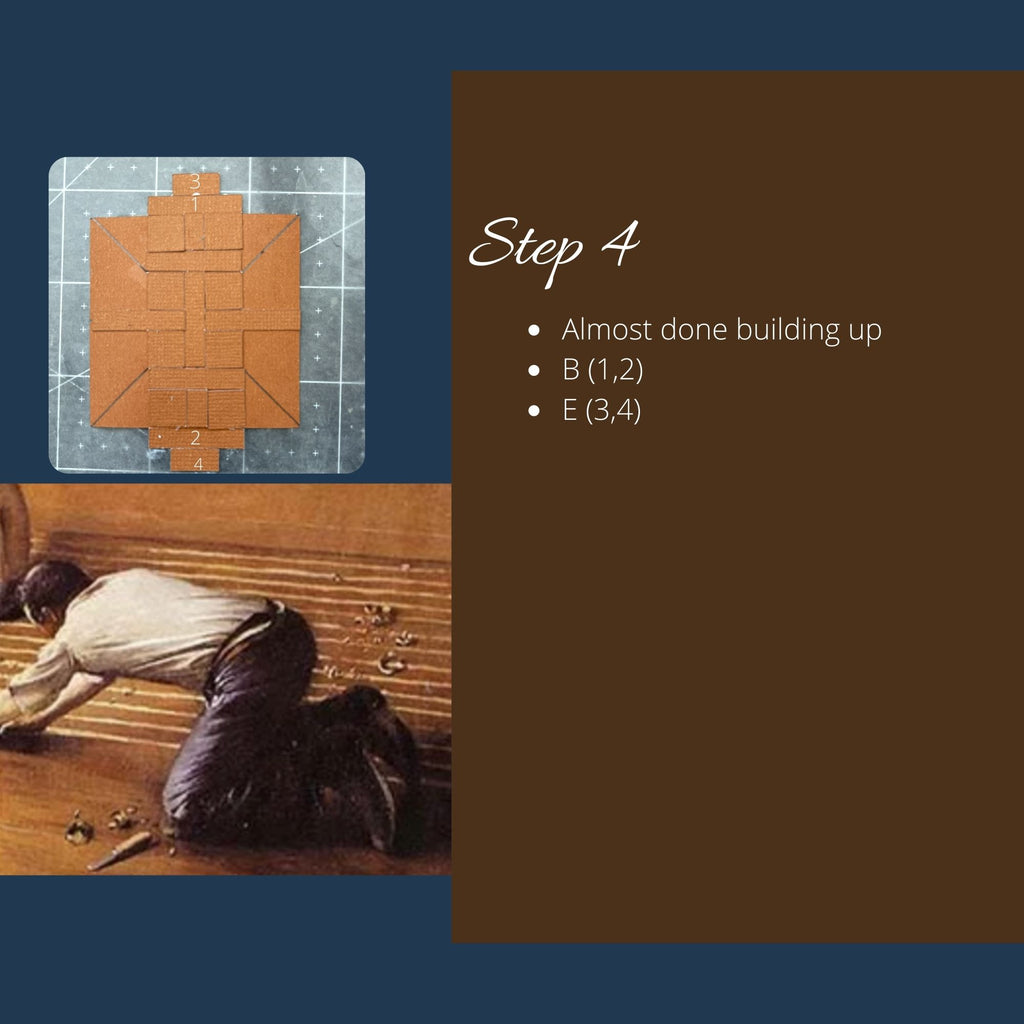
I am very visual and it took me a couple of tries to figure out how the pieces have to fit together. I have marked all the pieces for you, so you can easily see what has to go where. The tiny F squares do get covered for the most part by the outer frame A. However since things tend to shift sometimes there are tiny gaps and that's why the F squares act as fillers.
Let's get started with the project by downloading the free PDF file for the template from here.I also have a new members-only access page for floor printables in 1/24, 1/12 and 1/6 scale. To gain access subscribe to my newsletter and I will send you the link.
I have included different colors floors in the file that you can print out as well. Make sure to set the settings to the best print quality for the best results.
Add the free PDF to your cart and go through the check out process. You will not be charged for anything ( this set up just makes it so that I can automatically send you the file). As soon as the check out is complete you will receive a link for the free download.

Now that you have your free printable - let's look at how to assemble the pieces.

The parchment paper is useful since it not only protects your work surface, but it helps to keep the pieces that will stick out of the square in place. It also does not add any bulk once you glue the tile in place.

I can not stress enough how important it is not to rotate the square. If you follow along just as I show you, you will save yourself a lot of time and won't get confused as to what goes where. I learned it the hard way :)


As I mentioned above, the layout of each dollhouse room varies. I found that a 6.5 cm square made visually sense for my room which measures 23.5 cm x 22.5 cm. If provided the separate pieces in the PDF template so you can adjust the size to your needs.
Coffee Stirrers come in various widths and I used the thinnest ones I could find which measure .4mm (1/8")- get the thinnest ones you can find.

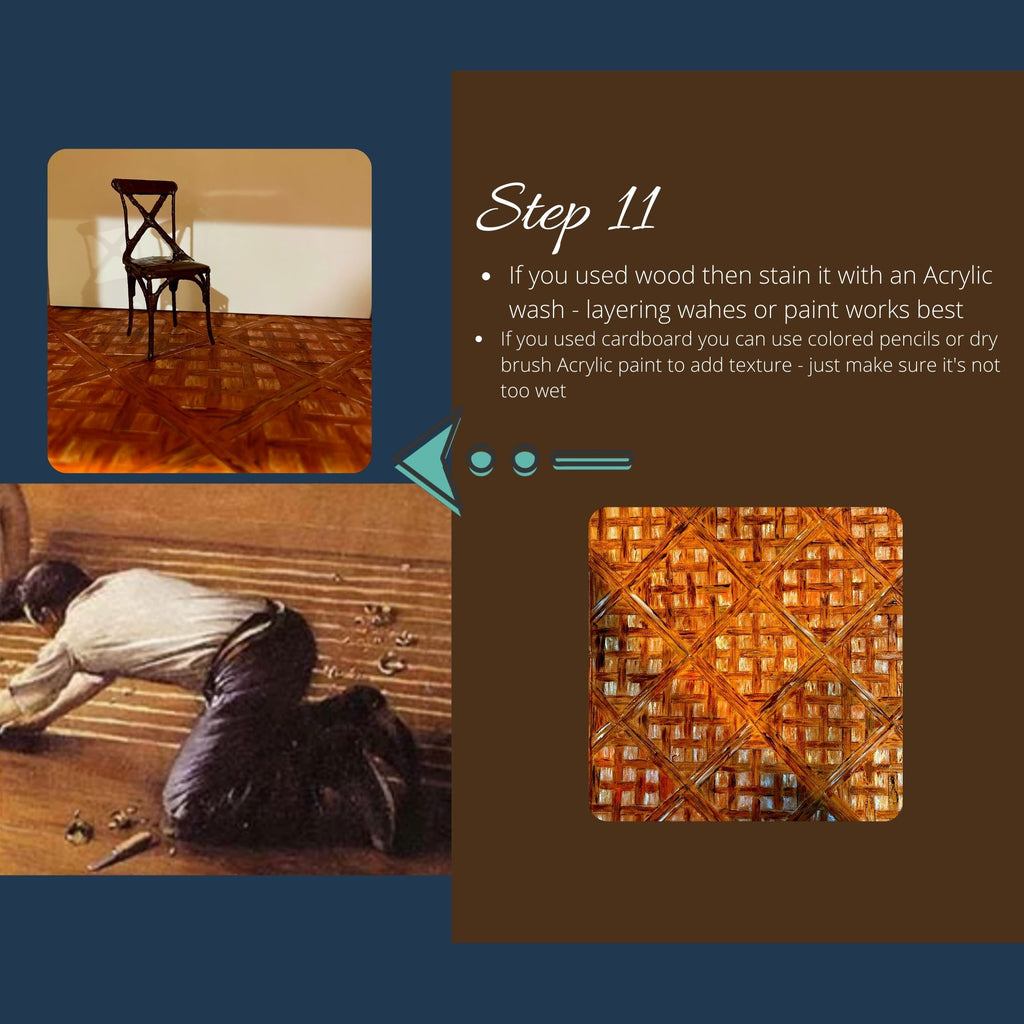
Let's chat about finishing the flooring with stain or paint. If you used wood you can use actual wood stain or mix any acrylic paint with water to create a wash. You can brush it on and wipe it slightly off, repeat until you get the desired effect. If you use card stock the only rule is not to get the card stock too wet. You can use colored pencils, pastels, chalks, dry brush acrylic paint (use very little water).
To finish it off you can add a bit of Mod Podge to seal it all in. It comes in Matt or Gloss Lustre and works well to seal in the color and protect your floor tiles from lifting off over time.
I hope that you find this tutorial helpful. If you end up making the Versailles Floor tag me at @portraits_by_nc on Instagram or on Facebook . I would love to see your floors!